Let’s see how we can make cookie photography better with these simple tips.
1. Plan a Cookie Photography Shoot Based on Your Goal
The most important thing before any shoot is deciding on your goal. Saying that you only want a photo of cookies isn’t enough. There are many ways you can take a cookie photo, but we need to pick one. These three questions are here to help you!
Who?
Who is your character? Who is the person baking your delicious cookies? This will define the atmosphere of your shot. The character might be your grandmother, baking cookies for her favourite grandchildren. Then the scene should be as warm and cosy as possible. Use warm colors, visible textures, and vintage props. Is the character of your shot a professional chef? In this case, everything should be crisp and minimalist. This cookie would be a masterpiece of culinary art. Nothing should distract your viewer from it. Think about a person, and this will lead you to choices in colors and props. That will help you create an expressive atmosphere.
When?
Time is important too. Is this a cookie you want for your breakfast? Then light your scene with a big source of soft light, creating the fresh feeling of a starting day. Is this an evening cookie that a child got before they went to sleep? Place your cookies on a tray with a glass of milk and put a fairytale book nearby. This question isn’t only about the time of the day. It’s about the time of year too! Halloween cookies are not the same as Christmas cookies. You would use different props and different color palettes to style them. And, of course, party cookies drastically differ from an office cookie snack.
Where?
Think about the place you’re going to enjoy cookies. What’s it like? Are you going to shoot your cookies straight out of the oven? Good! So, you can showcase your modern kitchen. Or show your grandmother’s rustic kitchen. Or maybe you want to take cookies elsewhere? Eat them in the park? Organize a little picnic? Share them with your coworkers during brainstorming? The question of location may seem too obvious. But it provides a key insight into the setting you’re about to create.
2. Use Color Theory to Choose Your Props
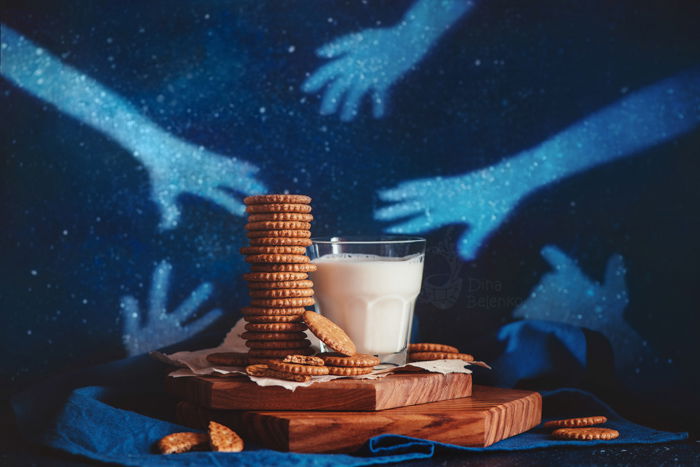
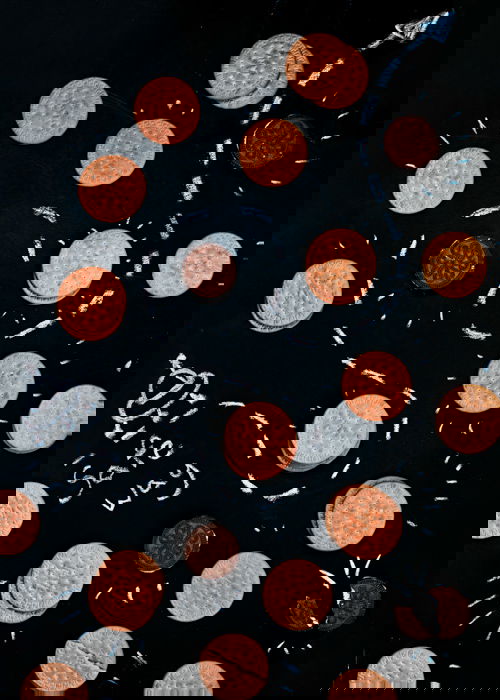
Most of the time, cookies have a warm color, varying from chocolaty dark to golden yellow. We can achieve a beautiful color contrast if we pair them with background and props of colder shades. An opposite color to orange is blue. So if you want an in-your-face, expressive color contrast, pick a bright blue background. The more subtle choice may be a dark blue background. Or an almost neutral grey background with a tinge of blue, green or purple. The same goes to props like napkins, teacups or baking utensils. Blue ceramics look absolutely fantastic with cookies. They don’t only provide color contrast, but a contrast of textures – smooth against rough. Additions like these occupy only a small part of the scene. But make photos a lot more lively and pleasant to look at.
3. Use Angles to Showcase the Best Sides of Your Cookie
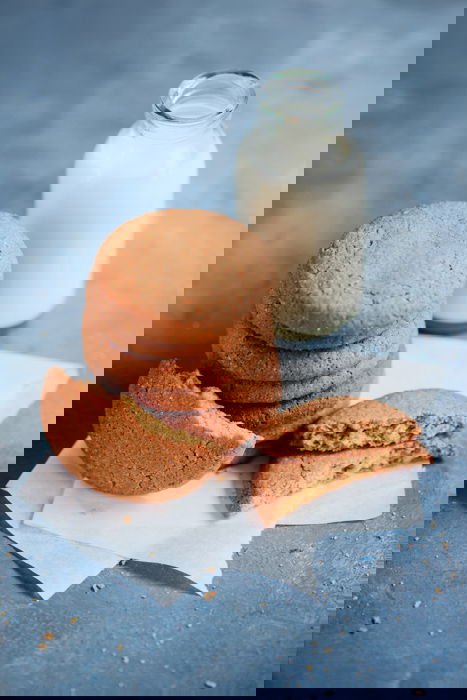
Cookies are not as capricious models as shortcakes or scoops of ice cream. But they can have their best side too. So, think about the angle you want to shoot from. Flat lay is great for cookies with sophisticated decorations. If the cook took their time to draw something on a biscuit, show it. Even if it’s only a smiley face. Don’t put cookies like that into a stack. Shoot them from above on a tray, wax paper, beautiful plate or even a baking sheet. You can photograph simple, undecorated cookies from that angle too. In this case, either take a macro shot or arrange a well-thought composition. Macro shot from this angle allows you to emphasise the texture. Especially for a chocolate chip cookie. More elaborate composition always looks great in a flat lay. Try arranging them geometrically in a triangle or in an S-shaped curve. Undecorated cookies like crackers or oatmeal cookies look best in a stack. Add some variety to it. Take a bite of one cookie and place it leaning on the stack. Or put the stack of three cookies on the edge of a teacup or a glass of milk. It looks visually interesting but doesn’t cross the line to being unnatural. For shots with stacks choose a lower angle, close to a frontal view.
If you have a very high stack of cookies, you can choose a really low angle. It will make the height of the stack look more impressive.
4. Use Creative Food Styling Techniques for Eye-Catching Images
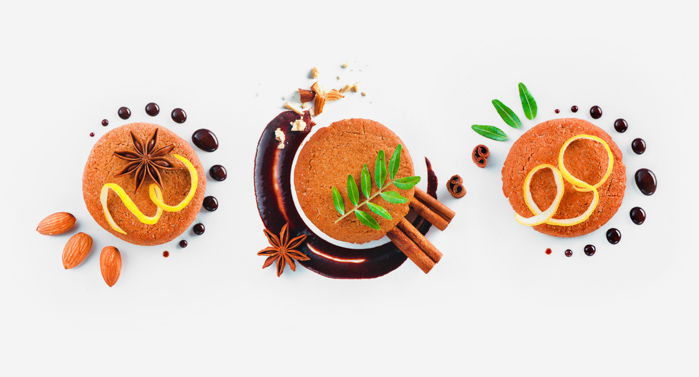
You can style cookies in a large variety of ways. Use chocolate, sugar or cocoa powder, lemon zest, nuts, sprinkles, glazing, and other decorative materials. You can use them on the plates too. Or in your background. I have three favourite ways to style cookies for a minimalist shoot. As an example, I used the most boring (though still delicious) oatmeal cookie, so its Cinderella transformation would be clear.
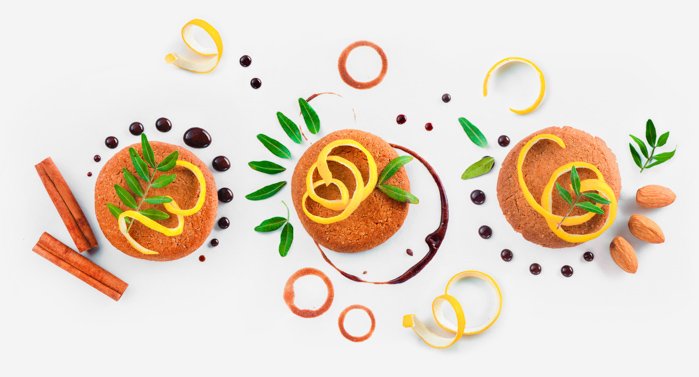
Chocolate Drops
The first and easiest way is to use chocolate drops. Take a small syringe, fill it with liquid chocolate and make some drops following the cookie perimeter. Or following any other imaginary curve. Continue this line with a couple of nuts or mint leaves, add a spiral of lemon zest and voila! It’s very easy to pull off but looks lovely. Love these creative tips? Discover more in our Creative Photography Cookbook!
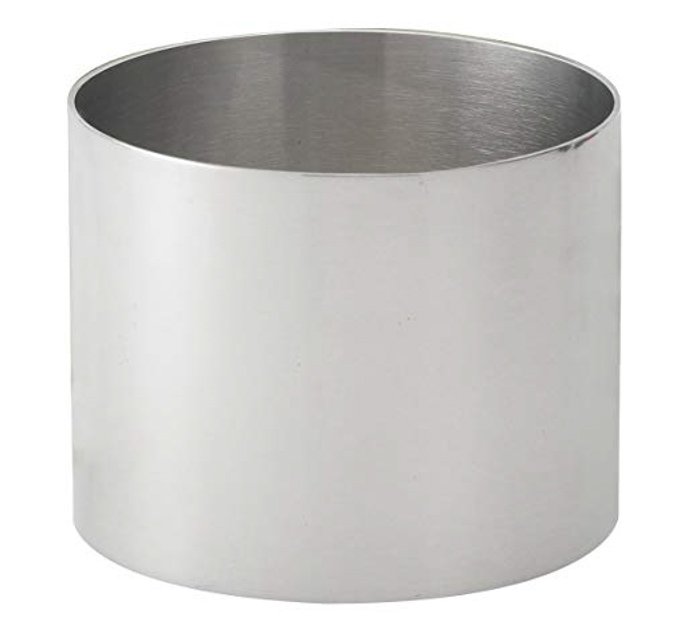
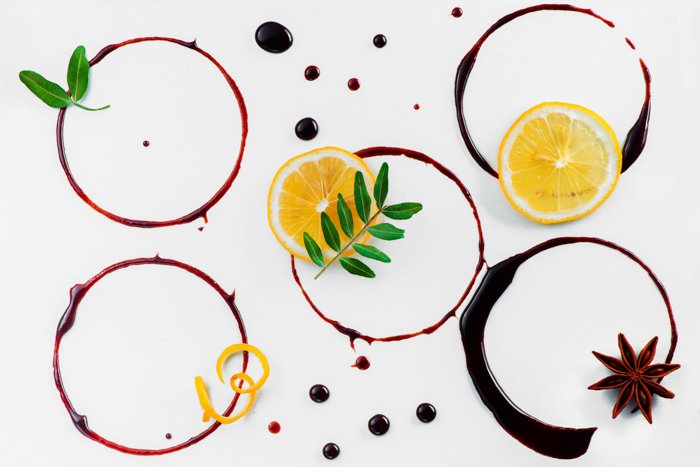
Sweet Circles
You can use a food ring to form layered desserts or fry eggs. But it is also useful for styling desserts. Dip one side of the ring in chocolate or colorful glazing and press it to the background surface. The steel ring is very thin, so the chocolate leaves a very prominent mark. If you use something with a wider edge, the chocolate would be printed in a thinner layer. Once you have a chocolate circle, put a cookie inside it. Add a slice of an orange, some cinnamon, an almond petal, an edible flower, a couple of mint leaves, anything you can find in your decorating arsenal.
Spoon Swoosh
The great way to add a little wow-factor to your dessert is a spoon swoosh. Start with a sauce like liquid chocolate, glazing or a fruit puree. Pour it onto a plate. Then dip a tip of the spoon in a sauce and drag it across the surface to leave an eye-catching sauce tail. You can do it in a straight line on in a curve. After that, place your cookie onto a swoosh and add a couple of small decorative touches like fruit slices, nuts or sprinkles. One last thing: never, ever touch a swoosh after it’s done. Things will get messy, and you won’t fix it anyway. If you don’t get the swoosh right on the first try, wipe it up and start over again. Use these tricks separately or combine them to make a lovely cookie pattern!
5. Use Extra Props for a More Interesting Composition
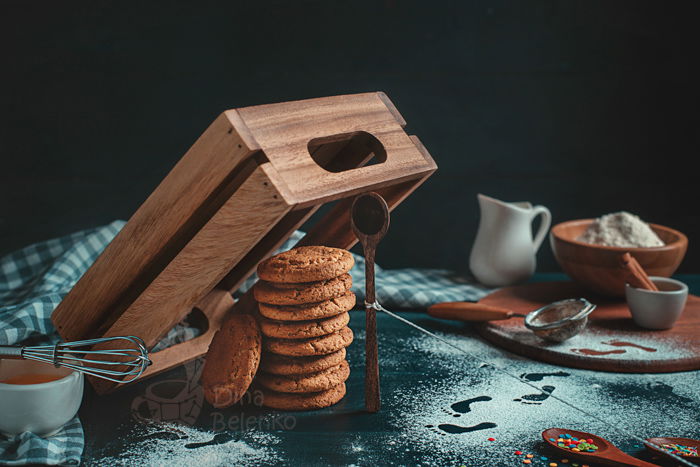
Cookies go well with a glass of milk, like bacon with eggs. But you can add other props to make the composition more engaging. First of all, try to showcase the recipe. If your cookies have any special ingredients like chocolate chips, raisins, toffees or fruits, show them! Add some baking utensils like whisks, spoons or baking sheets. Don’t be afraid to show the process, it may be even more interesting than the result! You can also use props like scales, boxes or even books to add some height to a stack of cookies. Using them should be motivated by your story. Try a photo of a reader who forgot their snack because the book was so exciting.
6. Create an Imaginary Character to Inspire Your Shoot
My favourite way to come up with an idea to a conceptual food photo is to think about the character. I try to imagine someone with a spark of adventure – a traveller, an artist, a pirate, a witch or a gardener. And then I imagine how they would go about some simple things. Like eating a cookie. For example, you can have a child with geometry homework. The way to make homework more fun is adding cookies, of course! Combine sweets with geometry elements to create an original flat lay.
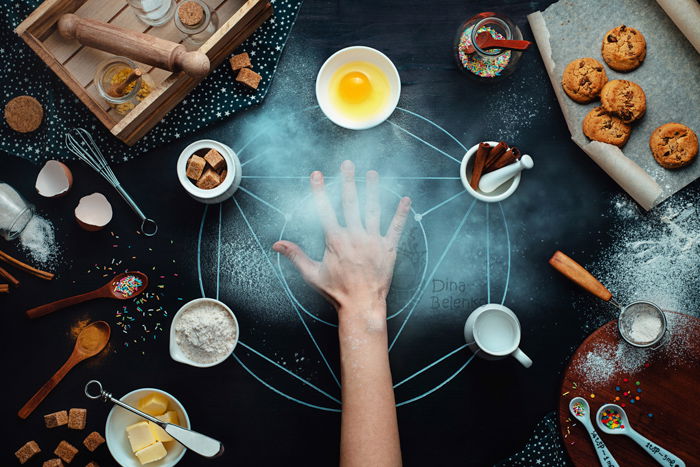
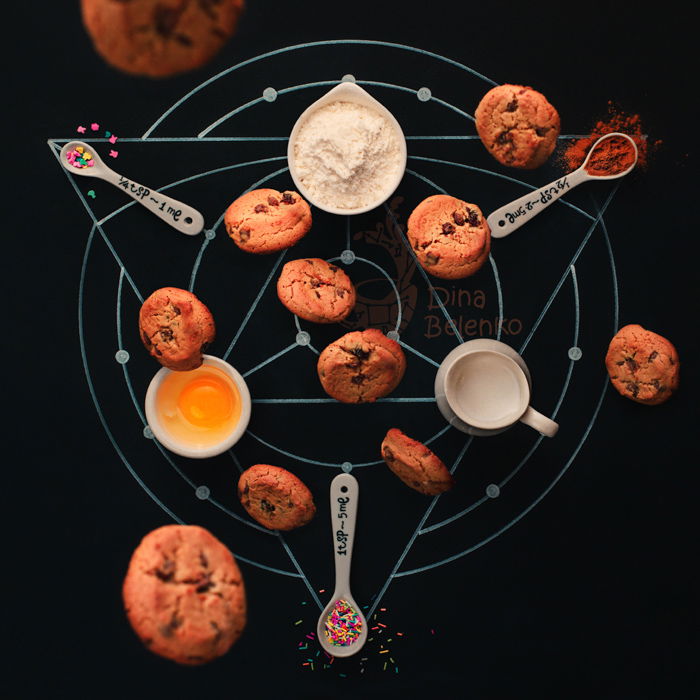
Or we can imagine an alchemist who can’t cook but attempts to summon some cookies by drawing a pentagram. This gives us an excuse to bring some magical stuff like candles and potions into the frame. A minimalist dark background with only pentagram and cookies (and maybe some ingredients) is also enough.
7. Get Creative With Cookie Photos and Change the Presentation
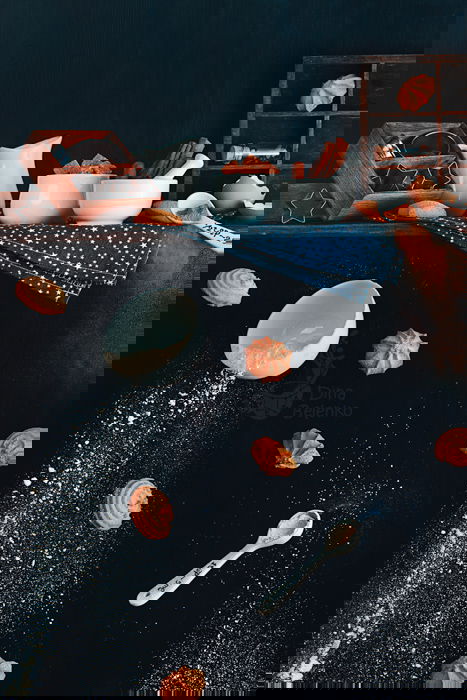
Another great way to approach cookie photography is to present your food like something very precious and desirable. It works with people every time. If someone else wants it, I want it too. Think about a scene where a cookie can take a role of something special like a museum piece, a golden nugget or the last point on a treasure map.
Place your cookie in a wedding ring box. Photograph it like a piece of jewellery. Place it under a glass dome. Imagine that cookies are the ultimate currency. Let your imagination run wild!
It may be helpful to make a mind map or a list of places that people associate with containing something precious. Write down everything from bank cells and art galleries to double bottom boxes and pirate treasure chests. Pick your story and show how good your cookies are!
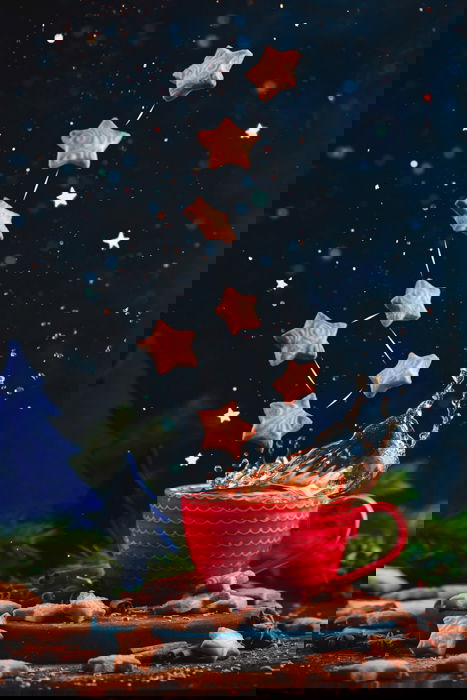
8. Photograph Levitating Cookies
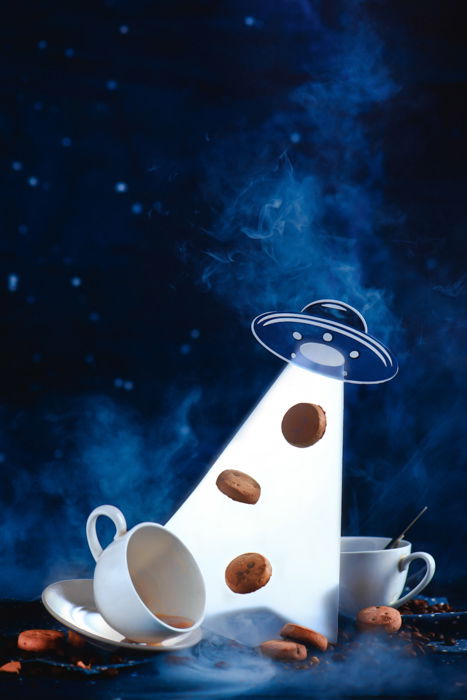
Levitating food is a fantastic way to add some dynamic to your photo. And flying cookies are not an exception. We have a detailed tutorial for you about this subject, but here’s the quick version. If you need the easiest solution possible, hold cookies in the air and photograph them separately. Merge these shots together in any image editor that supports layers. Make sure you don’t need to draw any additional shadows. If you want a more dynamic picture, fix all the cookies in the air with wire, wooden skewers or any supports you like. This way, you wouldn’t need to worry about additional shadows or reflections; they would be totally natural. You can add some extra motion and scatter some powdered sugar in the air. After that, retouch the supports during post-processing. Bonus points for combining flying cookies with a splash of milk or chocolate. Food in motion looks incredibly delicious, so try it, don’t be afraid.
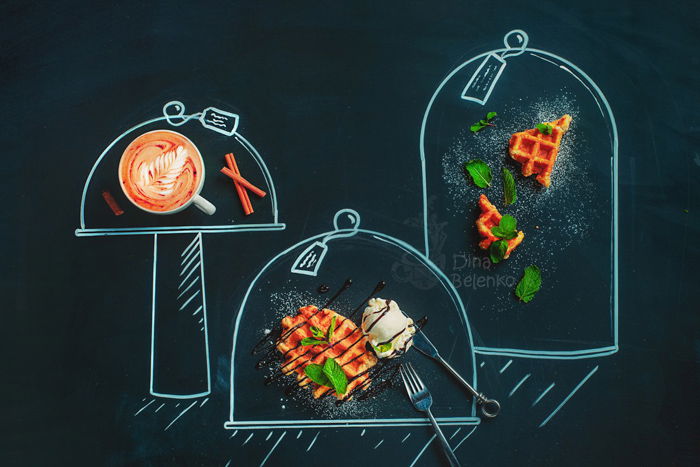
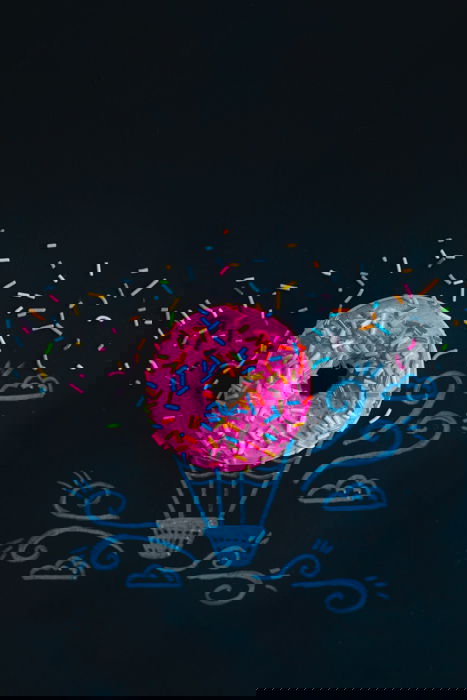
9. Use a Chalkboard to Tell Your Cookie Story
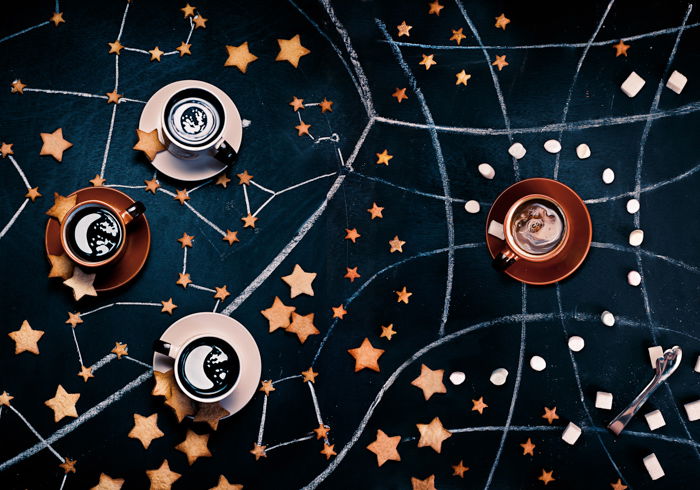
If all you have is your cookies and dark background, try using chalk drawing to lighten things up! Draw a hot air balloon and place a cookie as an essential part of it. Or draw a vinyl record player and play cookie music. Place your cookie in a frame of a globe, so it can represent the entire Earth. Or maybe form a constellation out of cookies and add some scattered flour as the Milky Way.
Chalk is a wonderful tool for photographers who want to work in creative still life, but lack equipment or props. It’s affordable, easy to use and provides a wide spectrum of narrative opportunities. You can transform your cookie into anything from a tennis ball to a spaceship! Or you can transform the environment by drawing books and teacups around real cookies. Not to mention making notes on your flat lay with recipe and ingredients.
10. Create a Message With Food Typography
Last but not least, try making letters and messages out of cookies. Think about all the sweet things you can say! There are three ways to approach the text in cookie photography. First, find alphabetical cookie cutters and spell your words with cookies. That needs a lot of preparation, but the results are great. If you make enough letters, you can take a lot of different photos during one session. Remember to plan your words in advance and make some extra letters to be on the safe side.
The second way is to buy ready-made cookies and make letters out of them. Cut and bite them or draw additional elements with cinnamon and chocolate. That way the viewer can read your message easily.
The third is using templates to make letters from flour, cocoa or powdered sugar, and placing cookies around as a part of a creative food photo. Make a template out of thick paper, scatter it with sugar and gently remove the template with tweezers. You’ll get letters made out of confectioner’s sugar with empty space around them you can fill with cookies and teacups.
Conclusion
Cookie photography is entertaining and there are limitless creative ideas to try out. I hope that these simple tips can inspire you to take some incredible cookie photos. Continue your photo experiments and have fun! To learn how to take stunning food photos, check out our ebook – Edible Images!


title: “10 Creative Cookie Photography Ideas For Delicious Photos” ShowToc: true date: “2023-01-18” author: “James Vazquez”
Let’s see how we can make cookie photography better with these simple tips.
1. Plan a Cookie Photography Shoot Based on Your Goal
The most important thing before any shoot is deciding on your goal. Saying that you only want a photo of cookies isn’t enough. There are many ways you can take a cookie photo, but we need to pick one. These three questions are here to help you!
Who?
Who is your character? Who is the person baking your delicious cookies? This will define the atmosphere of your shot. The character might be your grandmother, baking cookies for her favourite grandchildren. Then the scene should be as warm and cosy as possible. Use warm colors, visible textures, and vintage props. Is the character of your shot a professional chef? In this case, everything should be crisp and minimalist. This cookie would be a masterpiece of culinary art. Nothing should distract your viewer from it. Think about a person, and this will lead you to choices in colors and props. That will help you create an expressive atmosphere.
When?
Time is important too. Is this a cookie you want for your breakfast? Then light your scene with a big source of soft light, creating the fresh feeling of a starting day. Is this an evening cookie that a child got before they went to sleep? Place your cookies on a tray with a glass of milk and put a fairytale book nearby. This question isn’t only about the time of the day. It’s about the time of year too! Halloween cookies are not the same as Christmas cookies. You would use different props and different color palettes to style them. And, of course, party cookies drastically differ from an office cookie snack.
Where?
Think about the place you’re going to enjoy cookies. What’s it like? Are you going to shoot your cookies straight out of the oven? Good! So, you can showcase your modern kitchen. Or show your grandmother’s rustic kitchen. Or maybe you want to take cookies elsewhere? Eat them in the park? Organize a little picnic? Share them with your coworkers during brainstorming? The question of location may seem too obvious. But it provides a key insight into the setting you’re about to create.
2. Use Color Theory to Choose Your Props
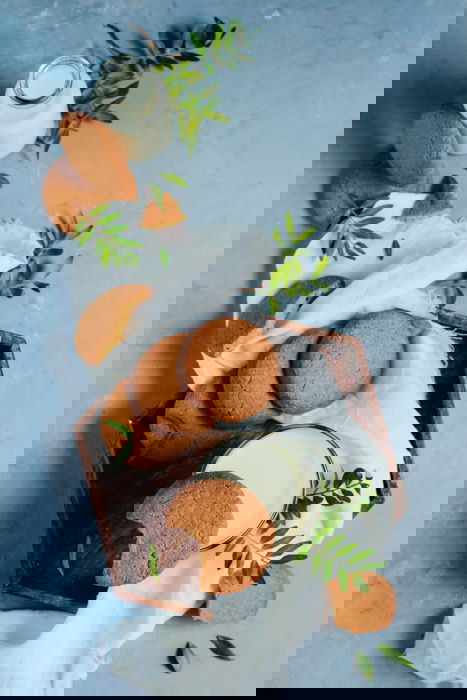
Most of the time, cookies have a warm color, varying from chocolaty dark to golden yellow. We can achieve a beautiful color contrast if we pair them with background and props of colder shades. An opposite color to orange is blue. So if you want an in-your-face, expressive color contrast, pick a bright blue background. The more subtle choice may be a dark blue background. Or an almost neutral grey background with a tinge of blue, green or purple. The same goes to props like napkins, teacups or baking utensils. Blue ceramics look absolutely fantastic with cookies. They don’t only provide color contrast, but a contrast of textures – smooth against rough. Additions like these occupy only a small part of the scene. But make photos a lot more lively and pleasant to look at.
3. Use Angles to Showcase the Best Sides of Your Cookie
Cookies are not as capricious models as shortcakes or scoops of ice cream. But they can have their best side too. So, think about the angle you want to shoot from. Flat lay is great for cookies with sophisticated decorations. If the cook took their time to draw something on a biscuit, show it. Even if it’s only a smiley face. Don’t put cookies like that into a stack. Shoot them from above on a tray, wax paper, beautiful plate or even a baking sheet. You can photograph simple, undecorated cookies from that angle too. In this case, either take a macro shot or arrange a well-thought composition. Macro shot from this angle allows you to emphasise the texture. Especially for a chocolate chip cookie. More elaborate composition always looks great in a flat lay. Try arranging them geometrically in a triangle or in an S-shaped curve. Undecorated cookies like crackers or oatmeal cookies look best in a stack. Add some variety to it. Take a bite of one cookie and place it leaning on the stack. Or put the stack of three cookies on the edge of a teacup or a glass of milk. It looks visually interesting but doesn’t cross the line to being unnatural. For shots with stacks choose a lower angle, close to a frontal view.
If you have a very high stack of cookies, you can choose a really low angle. It will make the height of the stack look more impressive.
4. Use Creative Food Styling Techniques for Eye-Catching Images
You can style cookies in a large variety of ways. Use chocolate, sugar or cocoa powder, lemon zest, nuts, sprinkles, glazing, and other decorative materials. You can use them on the plates too. Or in your background. I have three favourite ways to style cookies for a minimalist shoot. As an example, I used the most boring (though still delicious) oatmeal cookie, so its Cinderella transformation would be clear.
Chocolate Drops
The first and easiest way is to use chocolate drops. Take a small syringe, fill it with liquid chocolate and make some drops following the cookie perimeter. Or following any other imaginary curve. Continue this line with a couple of nuts or mint leaves, add a spiral of lemon zest and voila! It’s very easy to pull off but looks lovely. Love these creative tips? Discover more in our Creative Photography Cookbook!
Sweet Circles
You can use a food ring to form layered desserts or fry eggs. But it is also useful for styling desserts. Dip one side of the ring in chocolate or colorful glazing and press it to the background surface. The steel ring is very thin, so the chocolate leaves a very prominent mark. If you use something with a wider edge, the chocolate would be printed in a thinner layer. Once you have a chocolate circle, put a cookie inside it. Add a slice of an orange, some cinnamon, an almond petal, an edible flower, a couple of mint leaves, anything you can find in your decorating arsenal.
Spoon Swoosh
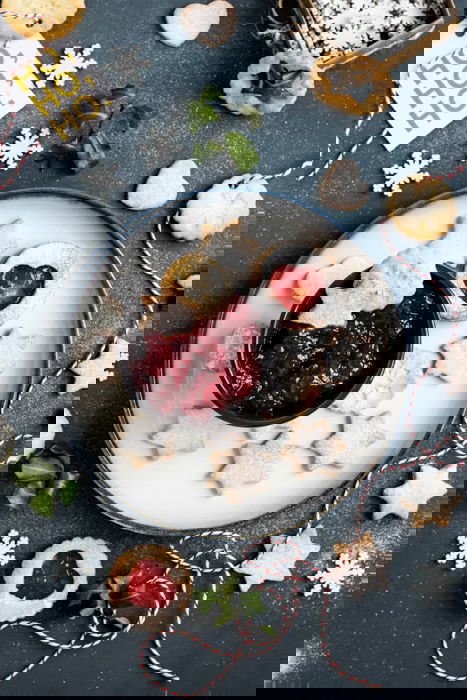
The great way to add a little wow-factor to your dessert is a spoon swoosh. Start with a sauce like liquid chocolate, glazing or a fruit puree. Pour it onto a plate. Then dip a tip of the spoon in a sauce and drag it across the surface to leave an eye-catching sauce tail. You can do it in a straight line on in a curve. After that, place your cookie onto a swoosh and add a couple of small decorative touches like fruit slices, nuts or sprinkles. One last thing: never, ever touch a swoosh after it’s done. Things will get messy, and you won’t fix it anyway. If you don’t get the swoosh right on the first try, wipe it up and start over again. Use these tricks separately or combine them to make a lovely cookie pattern!
5. Use Extra Props for a More Interesting Composition
Cookies go well with a glass of milk, like bacon with eggs. But you can add other props to make the composition more engaging. First of all, try to showcase the recipe. If your cookies have any special ingredients like chocolate chips, raisins, toffees or fruits, show them! Add some baking utensils like whisks, spoons or baking sheets. Don’t be afraid to show the process, it may be even more interesting than the result! You can also use props like scales, boxes or even books to add some height to a stack of cookies. Using them should be motivated by your story. Try a photo of a reader who forgot their snack because the book was so exciting.
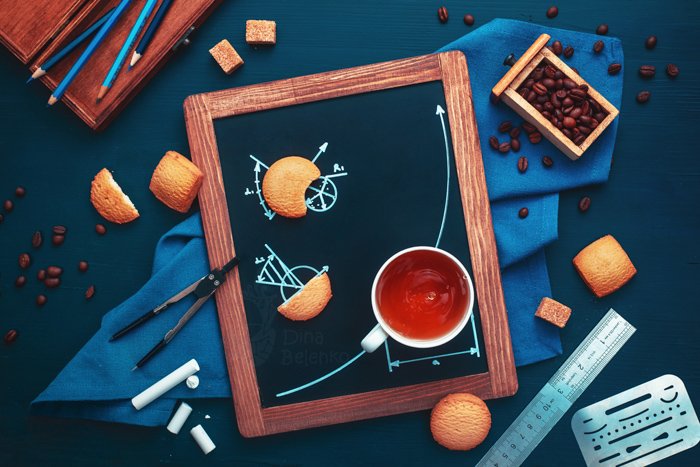
6. Create an Imaginary Character to Inspire Your Shoot
My favourite way to come up with an idea to a conceptual food photo is to think about the character. I try to imagine someone with a spark of adventure – a traveller, an artist, a pirate, a witch or a gardener. And then I imagine how they would go about some simple things. Like eating a cookie. For example, you can have a child with geometry homework. The way to make homework more fun is adding cookies, of course! Combine sweets with geometry elements to create an original flat lay.
Or we can imagine an alchemist who can’t cook but attempts to summon some cookies by drawing a pentagram. This gives us an excuse to bring some magical stuff like candles and potions into the frame. A minimalist dark background with only pentagram and cookies (and maybe some ingredients) is also enough.
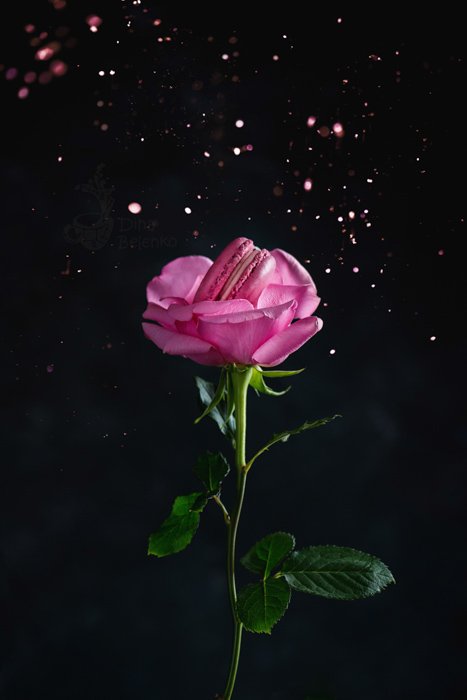
7. Get Creative With Cookie Photos and Change the Presentation
Another great way to approach cookie photography is to present your food like something very precious and desirable. It works with people every time. If someone else wants it, I want it too. Think about a scene where a cookie can take a role of something special like a museum piece, a golden nugget or the last point on a treasure map.
Place your cookie in a wedding ring box. Photograph it like a piece of jewellery. Place it under a glass dome. Imagine that cookies are the ultimate currency. Let your imagination run wild!
It may be helpful to make a mind map or a list of places that people associate with containing something precious. Write down everything from bank cells and art galleries to double bottom boxes and pirate treasure chests. Pick your story and show how good your cookies are!
8. Photograph Levitating Cookies
Levitating food is a fantastic way to add some dynamic to your photo. And flying cookies are not an exception. We have a detailed tutorial for you about this subject, but here’s the quick version. If you need the easiest solution possible, hold cookies in the air and photograph them separately. Merge these shots together in any image editor that supports layers. Make sure you don’t need to draw any additional shadows. If you want a more dynamic picture, fix all the cookies in the air with wire, wooden skewers or any supports you like. This way, you wouldn’t need to worry about additional shadows or reflections; they would be totally natural. You can add some extra motion and scatter some powdered sugar in the air. After that, retouch the supports during post-processing. Bonus points for combining flying cookies with a splash of milk or chocolate. Food in motion looks incredibly delicious, so try it, don’t be afraid.
9. Use a Chalkboard to Tell Your Cookie Story
If all you have is your cookies and dark background, try using chalk drawing to lighten things up! Draw a hot air balloon and place a cookie as an essential part of it. Or draw a vinyl record player and play cookie music. Place your cookie in a frame of a globe, so it can represent the entire Earth. Or maybe form a constellation out of cookies and add some scattered flour as the Milky Way.
Chalk is a wonderful tool for photographers who want to work in creative still life, but lack equipment or props. It’s affordable, easy to use and provides a wide spectrum of narrative opportunities. You can transform your cookie into anything from a tennis ball to a spaceship! Or you can transform the environment by drawing books and teacups around real cookies. Not to mention making notes on your flat lay with recipe and ingredients.
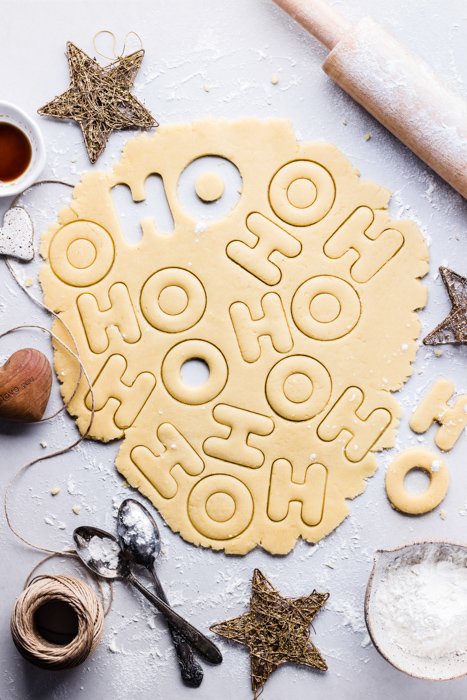
10. Create a Message With Food Typography
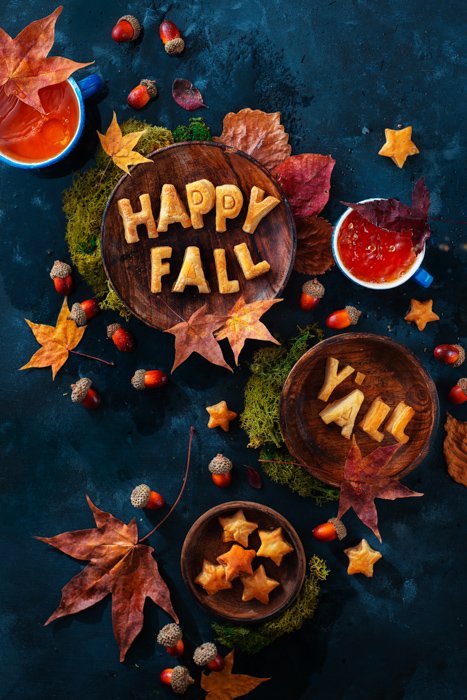
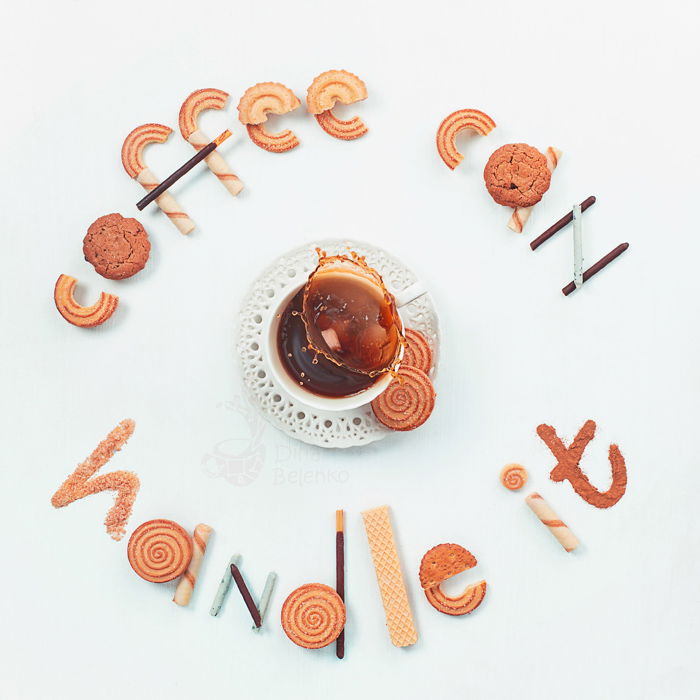
Last but not least, try making letters and messages out of cookies. Think about all the sweet things you can say! There are three ways to approach the text in cookie photography. First, find alphabetical cookie cutters and spell your words with cookies. That needs a lot of preparation, but the results are great. If you make enough letters, you can take a lot of different photos during one session. Remember to plan your words in advance and make some extra letters to be on the safe side.
The second way is to buy ready-made cookies and make letters out of them. Cut and bite them or draw additional elements with cinnamon and chocolate. That way the viewer can read your message easily.
The third is using templates to make letters from flour, cocoa or powdered sugar, and placing cookies around as a part of a creative food photo. Make a template out of thick paper, scatter it with sugar and gently remove the template with tweezers. You’ll get letters made out of confectioner’s sugar with empty space around them you can fill with cookies and teacups.
Conclusion
Cookie photography is entertaining and there are limitless creative ideas to try out. I hope that these simple tips can inspire you to take some incredible cookie photos. Continue your photo experiments and have fun! To learn how to take stunning food photos, check out our ebook – Edible Images!
