One easy way to fix bad photos is by reviewing our images before we leave a location. Then we at least have another chance to take the shot. For all other ways to fix bad photos, read on! [ExpertPhotography is supported by readers. Product links on ExpertPhotography are referral links. If you use one of these and buy something, we make a little bit of money. Need more info? See how it all works here.]
1. Add Structure for More Pleasing Looks
Composition is one of the most basic ideas behind photography. It’s also one of the most important areas that many photographers overlook. Some think snapping away and capturing a scene without any forethought is good enough. Some might even believe this works for documentary photographers placed in conflict zones. But that’s not the case. The majority of experienced photographers have basic ideas of how they will frame a shot. Even if they find themselves in dangerous situations with little time to take a picture, they hone their instincts to compose a scene well. Generally, it will be compositional changes that turn a bad image into a good one. It helps give a scene structure and make it more pleasing to the eye.
Composition Rules to Fix Bad Photos
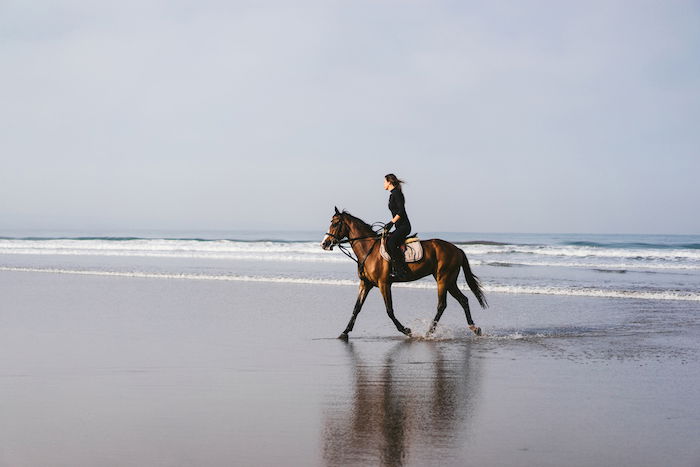
We have all seen thousands of images taken at the beach. And the ones that stand out are the ones with more dynamic compositions. Subtle ideas are best. For example, when capturing a landscape scene, follow the rule of thirds. But this doesn’t mean that everything in your scene needs to fall on the four intersections. You can use the lines between the intersections, guiding you to capture a third of the sky and two-thirds of the land. Composition principles are used well when you can’t even tell it was an idea in the photographer’s mind. Your viewers will thank you for it. But this is just one way that composition can help us fix bad photos. There are many different compositions we can use. You can start by looking at our beginner’s guide to composition.
2. Correct Color Temperature
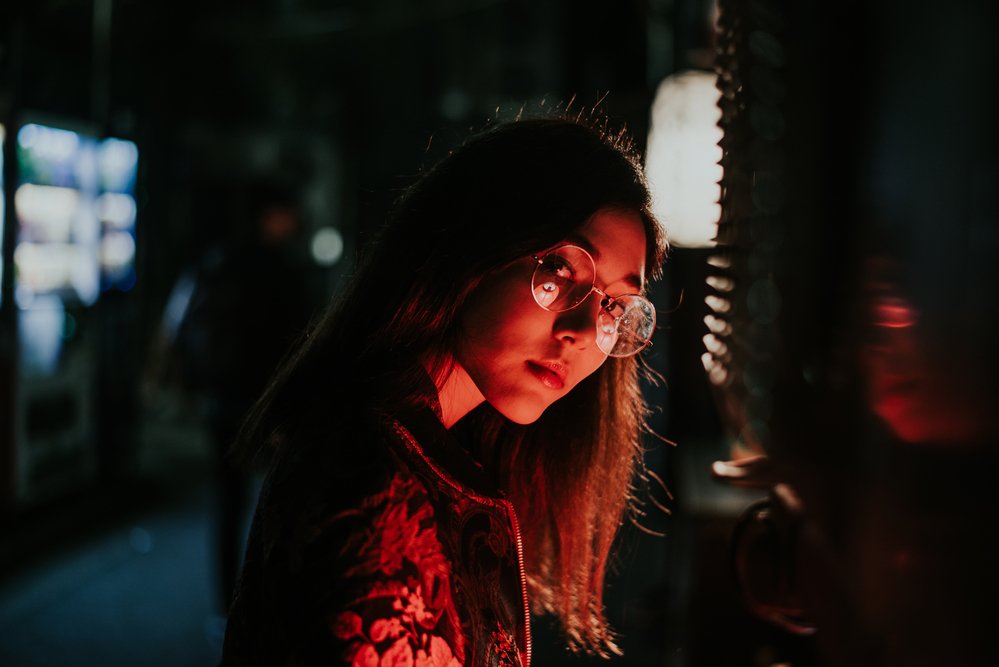
White balance is vital. It’s because you want your images to reflect a realistic environment. To ensure that whites are whites, use the right setting for the light you are working with. Every light source has a different color temperature. The sun is warmer than moonlight. But moonlight is warmer than a clear blue sky! These differences in color temperature need to be accounted for. Most beginner or hobbyist photographers will use Automatic White Balance (AWB). This might allow them to photograph without overthinking about their scene. However, it won’t give them the best and most realistic color cast.
White Balance Settings
Ee can choose between Tungsten, Fluorescent, Daylight, Cloudy, Shade and Flash in our camera settings. By using a setting closest to the color temperature in our scene, we can fix odd-looking lighting in photos. This is especially true if we are photographing in JPEG format. For RAW file images, post-processing software, such as Lightroom, allow us to fix the image’s white balance after the fact. For more in-depth knowledge about how to use white balance settings to fix bad photos, read our article on how to understand white balance.
3. Tweak Photos Using Exposure Compensation
Exposure compensation is not a new feature with photography. But many photographers overlook it. Either they don’t know it exists or don’t know how it works. When we photograph in any semi-automatic camera setting, such as aperture priority or shutter priority mode, exposure compensation is possible. These scaled settings allow us to fix the exposure in our scene. It’s the only way to change exposure settings without forcing the camera to meter the whole scene again. (Manual mode doesn’t allow exposure compensation.)
Adjusting Exposure Compensation to Fix Bad Photos
The exposure compensation scale runs from -3 to +3 with five incremental stops in-between. Our cameras are set to 0 by default. So, let’s say we photograph a scene using spot metering while using aperture priority. And we focus, and meter on a subjects face. Then we realise that the background could do with a little more light. In this case, we set the exposure value to +1, +2, or +3. These settings add one, two, or three more stops of light in the scene. It does this while allowing us to keep our aperture, depth of field, shutter speed and ISO. Adding or taking away a stop of light or two is essential to fix bad photos. For more information on this topic, you can read our article on how to master exposure compensation.
4. Change Perspective to Fix Boring Pictures
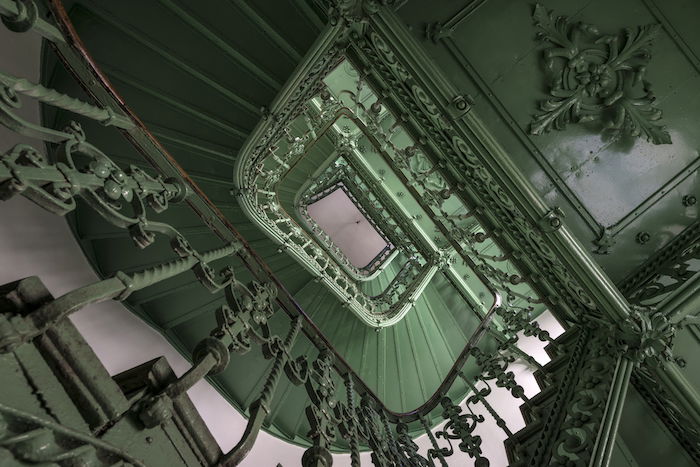
Many photographers never think about perspective when they capture a scene. They hold the camera out in front of them at eye level and snap away. We all see the world from this point of view, and it isn’t exciting. These are scenes that we see all the time, day in and day out. These scenes need more exciting angles, and changing our perspective is just one way we can do this. Doing so allows people to see familiar scenes in a new light. So, get on the ground and give us a worm’s-eye view. Or get above and shoot down, capturing a bird’s-eye view. Showing an environment in a different way helps fix bad photos. Be creative and try out different perspectives. For more in-depth ideas, we have an article on perspective in photography you can check out.
5. Use Camera Modes to Fix Problems
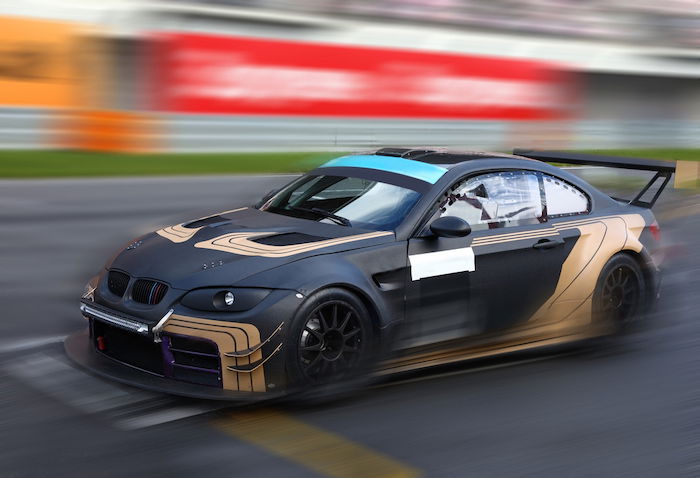
The settings we choose to shoot with are dictated by our scene and our subject’s actions. We also need to adapt our settings if our images aren’t working out. To help fix bad photos, we need to understand each camera mode and what they do. Photographing a moving sports car with aperture priority will result in unfocused subject images. But shutter speed priority mode lets us take sharp photos of speeding cars, with the camera setting the correct aperture. In the same way, if our landscape photos are missing bokeh, we should use aperture priority mode to set lower f-stops for a smaller depth field. For more help with camera modes, read our article about everything you need to know about shooting modes.
6. Four Ways to Fix Blurry Images
We all do it. And some of us might not understand how we took a bunch of blurry images. Our shoot from earlier on in the day might not have gone well. But it might provide us with knowledge, ensuring we never make the same mistakes again. There are many reasons why our images might be blurry. Here are a few of them with ways to fix them:
We use a slow shutter speed. Generally speaking, our shutter speed should be equal to or more than the lens’s focal length. If we have an 85mm prime lens, we need to use anything above 1/60 s. With a tripod and shutter release cable, you can use any shutter speed. We need a small aperture for better focus. Wide apertures can be challenging to use. An aperture of f/1.4 provides beautiful bokeh. But it is difficult to focus with such a small depth of field. Our focal area is millimetres in length. It is tough to manage in low-light areas or with moving subjects. Open the aperture and give your subject a larger depth of field to work with. We need to calibrate our lens. Focusing problems result in a few blurry images. If every one of your images is blurry, we might need to calibrate our lenses. No matter which lens we buy, it might not be perfectly calibrated to our camera model. Read our article on lens calibration for more information. Our lens and camera might have autofocus (AF) problems. If you use your zoom or prime lenses all the time, they might suffer from autofocus problems. This problem might occur across the front or back focus. It is easy to correct, and our article on fixing autofocus issues will help.
So, to recap… blurry images might be due to using the wrong settings or a failure from your equipment. Going through the above points will help you fix bad photos!
7. Avoid Excessive Edits for More Natural Looks
High Dynamic Range (HDR) images give scenes a very surreal and noticeable look. They can start to look bad when they are over-processed. If our style demands over-processing, that’s fine. But we can learn a lot for painters who know when to stop applying paint. It’s the same for photographers. Too many layers of edits in Photoshop can start to look bad. Post-processing software, such as Lightroom, can be essential in adjusting a few settings. But by using too much clarity, saturation, or vibrancy, we can adversely affect our images. We want people to look at our work and say, ‘Wow!’ and not ‘Huh?’. So look for ways to cull back edits. For instance, using smart objects in Photoshop can help you make edits that you can easily walk back! For help on editing your images correctly, read our ten best tips for a faster workflow. It will help you fix bad photos in a flash!
8. Use Metering Modes to Fix Lighting Problems
Lighting is the most critical detail in photography to get right. Without adequate lighting, our images will be dull and flat. The lighting we use will depend on your scene. What light is available? What style do you want to achieve? Effective lighting can make or break an image. And it can be creatively harnessed in so many ways. Some photographers prefer natural light and shoot outdoors or near windows. Others prefer to control the light and shoot with flash units, strobes or other studio equipment.
Correctly Expose Images
Whatever we use, we have to ensure the light isn’t too strong that we blow out your highlights. But the light needs to be strong enough. Otherwise, our image is underexposed. For this, metering modes are valuable. They help us capture the best light for our scene or subject. Using the proper modes will ensure properly exposed photos and save us valuable time shooting and editing. Or, for better lighting conditions, we could re-shoot at ideal times of day like golden hour or blue hour. For more help, see our metering modes article and our ultimate lighting guide. Refocusing on lighting can help us fix bad photos.
Conclusion
Nobody’s perfect. We all take bad photos sometimes. The best thing we can do is learn from our mistakes and try taking or editing the picture again. Whether it’s adjusting our shutter speed to properly expose an image, calibrating our lens to fix our focus, or using a tripod in low light instead of shooting handheld… there are so many simple ways we can fix bad photos. We hope you’ve found the best way to fix yours! Try out the Preset Collection for shortcuts to perfection! Images in this article provided by DepositPhotos.


title: “8 Simple Secrets To Fix Bad Photos Effectively " ShowToc: true date: “2023-02-19” author: “Bruce Amerson”
One easy way to fix bad photos is by reviewing our images before we leave a location. Then we at least have another chance to take the shot. For all other ways to fix bad photos, read on! [ExpertPhotography is supported by readers. Product links on ExpertPhotography are referral links. If you use one of these and buy something, we make a little bit of money. Need more info? See how it all works here.]
1. Add Structure for More Pleasing Looks
Composition is one of the most basic ideas behind photography. It’s also one of the most important areas that many photographers overlook. Some think snapping away and capturing a scene without any forethought is good enough. Some might even believe this works for documentary photographers placed in conflict zones. But that’s not the case. The majority of experienced photographers have basic ideas of how they will frame a shot. Even if they find themselves in dangerous situations with little time to take a picture, they hone their instincts to compose a scene well. Generally, it will be compositional changes that turn a bad image into a good one. It helps give a scene structure and make it more pleasing to the eye.
Composition Rules to Fix Bad Photos
We have all seen thousands of images taken at the beach. And the ones that stand out are the ones with more dynamic compositions. Subtle ideas are best. For example, when capturing a landscape scene, follow the rule of thirds. But this doesn’t mean that everything in your scene needs to fall on the four intersections. You can use the lines between the intersections, guiding you to capture a third of the sky and two-thirds of the land. Composition principles are used well when you can’t even tell it was an idea in the photographer’s mind. Your viewers will thank you for it. But this is just one way that composition can help us fix bad photos. There are many different compositions we can use. You can start by looking at our beginner’s guide to composition.
2. Correct Color Temperature
White balance is vital. It’s because you want your images to reflect a realistic environment. To ensure that whites are whites, use the right setting for the light you are working with. Every light source has a different color temperature. The sun is warmer than moonlight. But moonlight is warmer than a clear blue sky! These differences in color temperature need to be accounted for. Most beginner or hobbyist photographers will use Automatic White Balance (AWB). This might allow them to photograph without overthinking about their scene. However, it won’t give them the best and most realistic color cast.
White Balance Settings
Ee can choose between Tungsten, Fluorescent, Daylight, Cloudy, Shade and Flash in our camera settings. By using a setting closest to the color temperature in our scene, we can fix odd-looking lighting in photos. This is especially true if we are photographing in JPEG format. For RAW file images, post-processing software, such as Lightroom, allow us to fix the image’s white balance after the fact. For more in-depth knowledge about how to use white balance settings to fix bad photos, read our article on how to understand white balance.
3. Tweak Photos Using Exposure Compensation
Exposure compensation is not a new feature with photography. But many photographers overlook it. Either they don’t know it exists or don’t know how it works. When we photograph in any semi-automatic camera setting, such as aperture priority or shutter priority mode, exposure compensation is possible. These scaled settings allow us to fix the exposure in our scene. It’s the only way to change exposure settings without forcing the camera to meter the whole scene again. (Manual mode doesn’t allow exposure compensation.)
Adjusting Exposure Compensation to Fix Bad Photos
The exposure compensation scale runs from -3 to +3 with five incremental stops in-between. Our cameras are set to 0 by default. So, let’s say we photograph a scene using spot metering while using aperture priority. And we focus, and meter on a subjects face. Then we realise that the background could do with a little more light. In this case, we set the exposure value to +1, +2, or +3. These settings add one, two, or three more stops of light in the scene. It does this while allowing us to keep our aperture, depth of field, shutter speed and ISO. Adding or taking away a stop of light or two is essential to fix bad photos. For more information on this topic, you can read our article on how to master exposure compensation.
4. Change Perspective to Fix Boring Pictures
Many photographers never think about perspective when they capture a scene. They hold the camera out in front of them at eye level and snap away. We all see the world from this point of view, and it isn’t exciting. These are scenes that we see all the time, day in and day out. These scenes need more exciting angles, and changing our perspective is just one way we can do this. Doing so allows people to see familiar scenes in a new light. So, get on the ground and give us a worm’s-eye view. Or get above and shoot down, capturing a bird’s-eye view. Showing an environment in a different way helps fix bad photos. Be creative and try out different perspectives. For more in-depth ideas, we have an article on perspective in photography you can check out.
5. Use Camera Modes to Fix Problems
The settings we choose to shoot with are dictated by our scene and our subject’s actions. We also need to adapt our settings if our images aren’t working out. To help fix bad photos, we need to understand each camera mode and what they do. Photographing a moving sports car with aperture priority will result in unfocused subject images. But shutter speed priority mode lets us take sharp photos of speeding cars, with the camera setting the correct aperture. In the same way, if our landscape photos are missing bokeh, we should use aperture priority mode to set lower f-stops for a smaller depth field. For more help with camera modes, read our article about everything you need to know about shooting modes.
6. Four Ways to Fix Blurry Images
We all do it. And some of us might not understand how we took a bunch of blurry images. Our shoot from earlier on in the day might not have gone well. But it might provide us with knowledge, ensuring we never make the same mistakes again. There are many reasons why our images might be blurry. Here are a few of them with ways to fix them:
We use a slow shutter speed. Generally speaking, our shutter speed should be equal to or more than the lens’s focal length. If we have an 85mm prime lens, we need to use anything above 1/60 s. With a tripod and shutter release cable, you can use any shutter speed. We need a small aperture for better focus. Wide apertures can be challenging to use. An aperture of f/1.4 provides beautiful bokeh. But it is difficult to focus with such a small depth of field. Our focal area is millimetres in length. It is tough to manage in low-light areas or with moving subjects. Open the aperture and give your subject a larger depth of field to work with. We need to calibrate our lens. Focusing problems result in a few blurry images. If every one of your images is blurry, we might need to calibrate our lenses. No matter which lens we buy, it might not be perfectly calibrated to our camera model. Read our article on lens calibration for more information. Our lens and camera might have autofocus (AF) problems. If you use your zoom or prime lenses all the time, they might suffer from autofocus problems. This problem might occur across the front or back focus. It is easy to correct, and our article on fixing autofocus issues will help.
So, to recap… blurry images might be due to using the wrong settings or a failure from your equipment. Going through the above points will help you fix bad photos!
7. Avoid Excessive Edits for More Natural Looks
High Dynamic Range (HDR) images give scenes a very surreal and noticeable look. They can start to look bad when they are over-processed. If our style demands over-processing, that’s fine. But we can learn a lot for painters who know when to stop applying paint. It’s the same for photographers. Too many layers of edits in Photoshop can start to look bad. Post-processing software, such as Lightroom, can be essential in adjusting a few settings. But by using too much clarity, saturation, or vibrancy, we can adversely affect our images. We want people to look at our work and say, ‘Wow!’ and not ‘Huh?’. So look for ways to cull back edits. For instance, using smart objects in Photoshop can help you make edits that you can easily walk back! For help on editing your images correctly, read our ten best tips for a faster workflow. It will help you fix bad photos in a flash!
8. Use Metering Modes to Fix Lighting Problems
Lighting is the most critical detail in photography to get right. Without adequate lighting, our images will be dull and flat. The lighting we use will depend on your scene. What light is available? What style do you want to achieve? Effective lighting can make or break an image. And it can be creatively harnessed in so many ways. Some photographers prefer natural light and shoot outdoors or near windows. Others prefer to control the light and shoot with flash units, strobes or other studio equipment.
Correctly Expose Images
Whatever we use, we have to ensure the light isn’t too strong that we blow out your highlights. But the light needs to be strong enough. Otherwise, our image is underexposed. For this, metering modes are valuable. They help us capture the best light for our scene or subject. Using the proper modes will ensure properly exposed photos and save us valuable time shooting and editing. Or, for better lighting conditions, we could re-shoot at ideal times of day like golden hour or blue hour. For more help, see our metering modes article and our ultimate lighting guide. Refocusing on lighting can help us fix bad photos.
Conclusion
Nobody’s perfect. We all take bad photos sometimes. The best thing we can do is learn from our mistakes and try taking or editing the picture again. Whether it’s adjusting our shutter speed to properly expose an image, calibrating our lens to fix our focus, or using a tripod in low light instead of shooting handheld… there are so many simple ways we can fix bad photos. We hope you’ve found the best way to fix yours! Try out the Preset Collection for shortcuts to perfection! Images in this article provided by DepositPhotos.
