Where to Find the Clone Stamp Tool in Photoshop
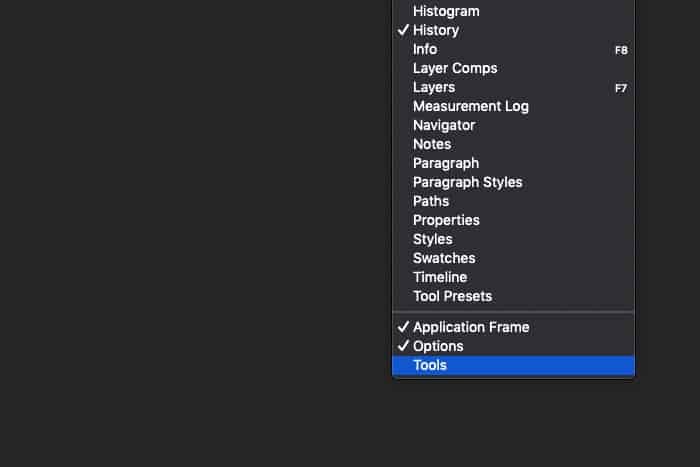
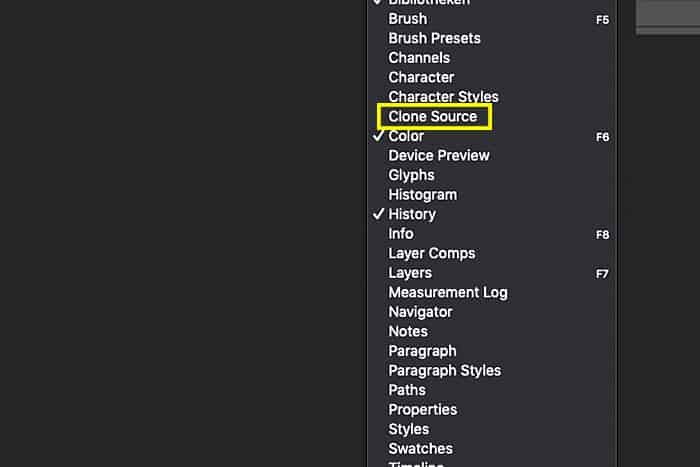
You can find the clone stamp in the tool bar on the left hand side. The shortcut for the clone stamp for both Mac OS and Windows is S. If you can’t see the tool bar on the left, make it visible using the ‘Window’ menu. Click on ‘Tools’ all the way down in the menu. For more difficult projects you will also need the ‘Clone Source’ panel. You can also find it in the ‘Window’ menu.
Remove Unwanted Objects With the Clone Stamp Tool
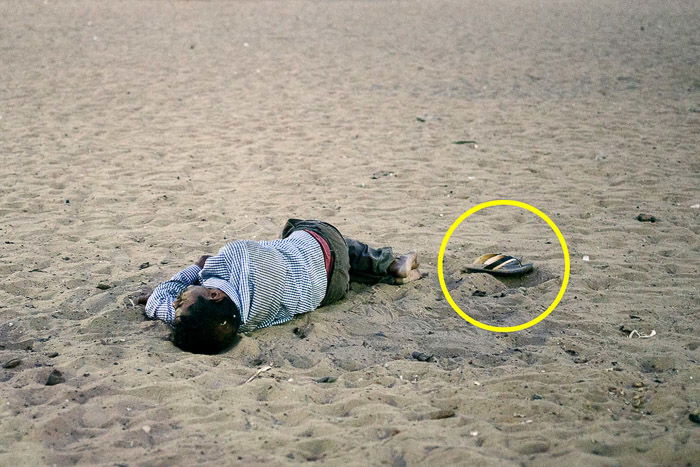
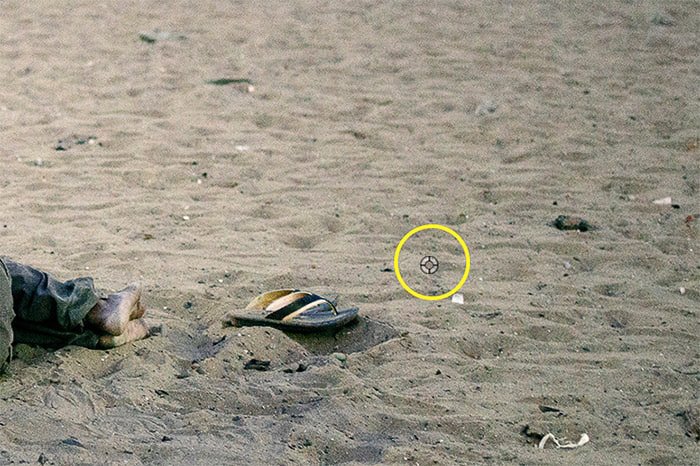
Imperfections or distractions could mess up a great fashion or publicity photo. Luckily, removing them with the clone stamp tool is easy. The clone stamp can remove anything from wires, dust spots, unwanted hair, and even people. It does this by cloning pixels from another part of the photo. Let’s say I want to remove the man’s sandals in the photo from a beach in India. I’ll show you how to do that with the clone stamp tool.
Step 1: Open the photo and zoom in
Open the photo you want to clean up and zoom in on the area you want to work with. Not too close, so you can still see what’s going on. Click on the clone stamp tool in the tool bar on the left. Always duplicate the background layer before you start working. This way, you can always go back to the original photo. Right click on the background layer and select ‘Duplicate Layer…’.
Step 2: Select a clone source
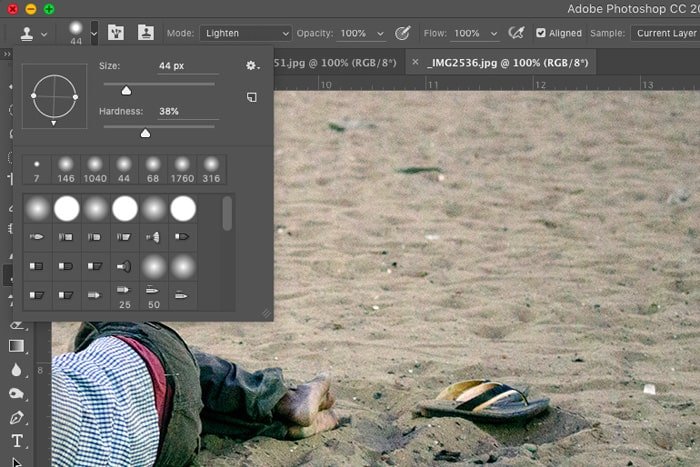
Pick a soft brush. Set the size of the clone stamp so it will cover the object you want to remove. It takes some practice to know how hard and big your brush should be. A good setting to start is a medium soft brush to achieve smooth edges. Move the cursor to the area you want to take pixels from. In this case I need sand. Use Alt-click to confirm your source pixels. The cursor will change into crosshairs. The moment you click, the cursor will change and show the pixels you’ve cloned.
Step 3: Paint over the object you want to remove
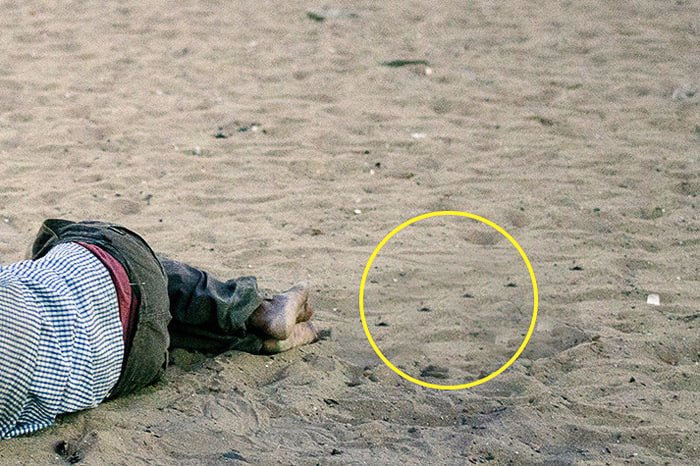
Now start painting over the object you want to remove. Make sure it’s not obvious that you are duplicating another part of the photo. If it’s noticeable, go back to clone other pixels and continue painting. Repeat this until everything looks natural. If you want to go a few steps back in Photoshop, use undo. Cmd + Z in Mac OS or Ctrl + Z in Windows. What you have to look out for is patterns. Patterns will give away the fact that you’ve cloned pixels and removed an object.
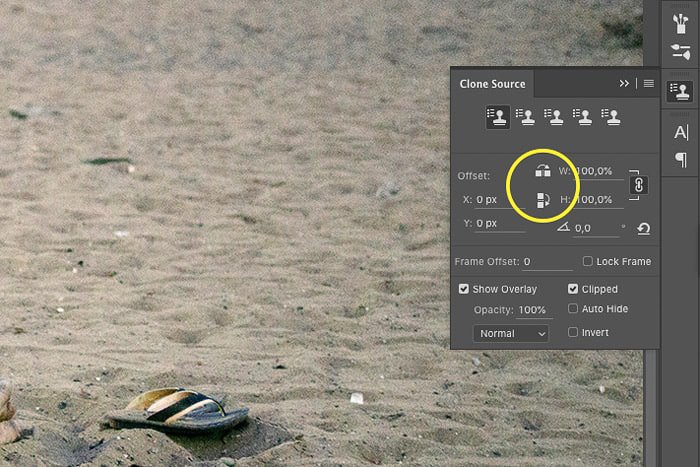
Avoid patterns to make the cloning look natural
The clone source panel comes in handy when trying to avoid patterns. Use the two mirror buttons to make your cloning look more natural. This will mirror the pixels you paint over the unwanted object. The result will look better. Playing around with the opacity of the brush will also help. Always try to mix different clone sources and opacity settings to get the best result. The edges of the clone stamp have to be as smooth as possible.
Remove Skin Imperfections With the Clone Stamp Tool in Photoshop
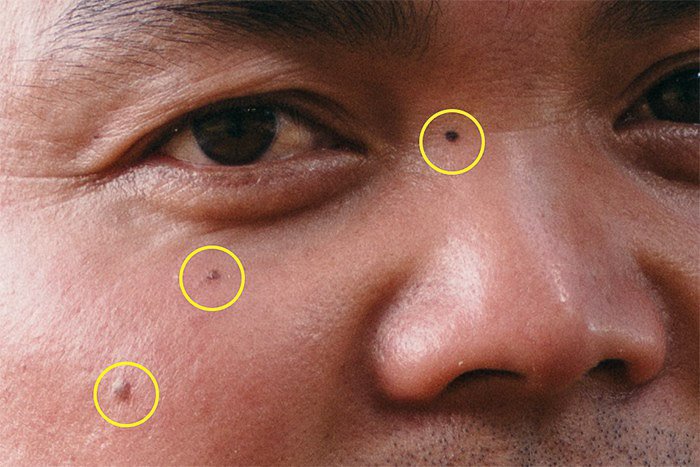
Here’s another way to use the clone stamp tool in Photoshop. It’s the perfect tool to remove skin imperfections. I’ll show you a specific technique that allows you to clean up imperfections and keep a natural look. I’m going to remove some spots from this man’s face.
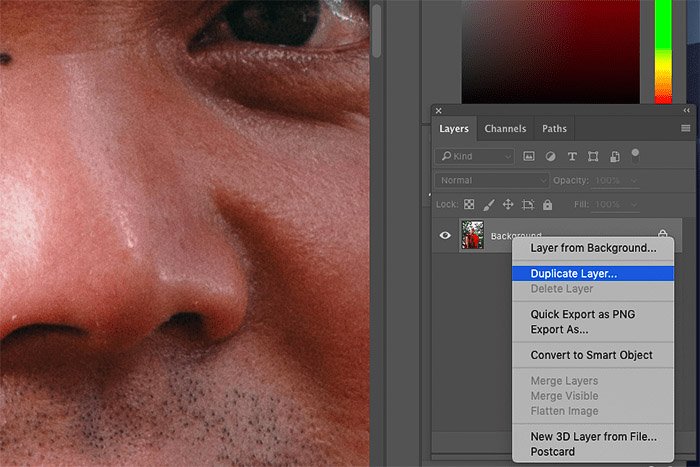
Step 1: Open the photo and duplicate the background layer
Open the photo and duplicate the background layer. Right click and select ‘Duplicate Layer…’. Now zoom in on the area with the skin imperfections you want to remove with the clone stamp. It’s better now to zoom in all the way to 100%.
Step 2: Select a clone source
Repeat ‘Step 2’ from the example above. This time, pick a part of the skin that’s similar looking to where the imperfections are.
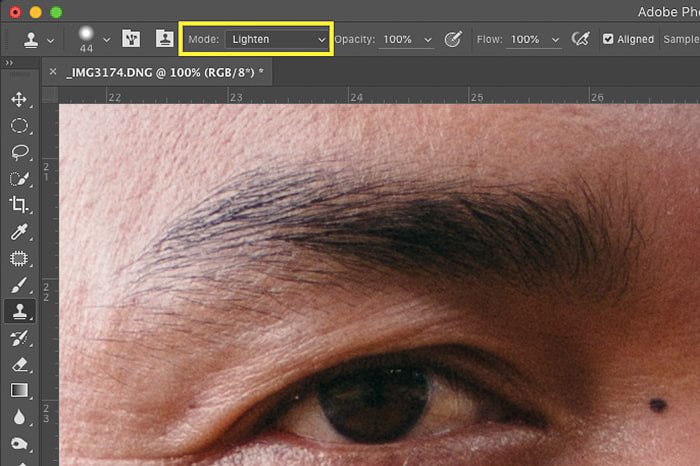
Step 3: Select brush mode
This is what makes this an excellent technique to remove skin imperfections. It allows you to target specific details that you want to remove. Set the brush mode to ‘Lighten’. The clone stamp will now only affect areas of the skin that are darker than the clone source selection. In this case, it will only affect the darker colored mole and make it lighter to match the skin around it. The rest of the skin will stay untouched. Set the brush mode to ‘Darken’ and the opposite will happen. I like this technique to remove wrinkles or spots on the skin. By setting the brush mode to ‘Lighten’ or ‘Darken’ you can target specific areas of the skin. The result looks very natural.
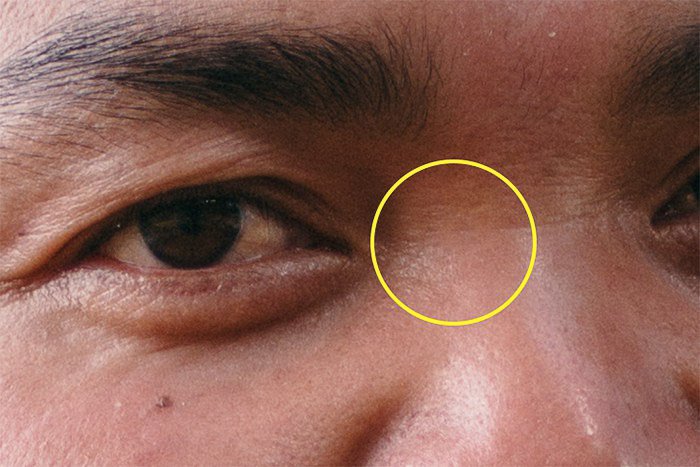
Step 4: Paint Over the Imperfection
Paint one or two times over the imperfection.
Conclusion
It takes practice to master the use of the clone stamp in Photoshop but it’s well worth it. It won’t blend pixels like the healing brush tool. This gives you full control. Start with easy Photoshop projects like removing dust spots or small skin imperfections. Once you master this, you can move on to removing objects or even people. Always look out for patterns when you think you’re finished! Patterns give away the fact that you’ve removed an object and it looks ugly and unnatural. Also, only use the clone stamp when necessary and for certain types of photography. Don’t remove objects from a photo if you’re practising photojournalism or documentary. It’s just not done.