Symmetrical vs Asymmetrical Balance Photography
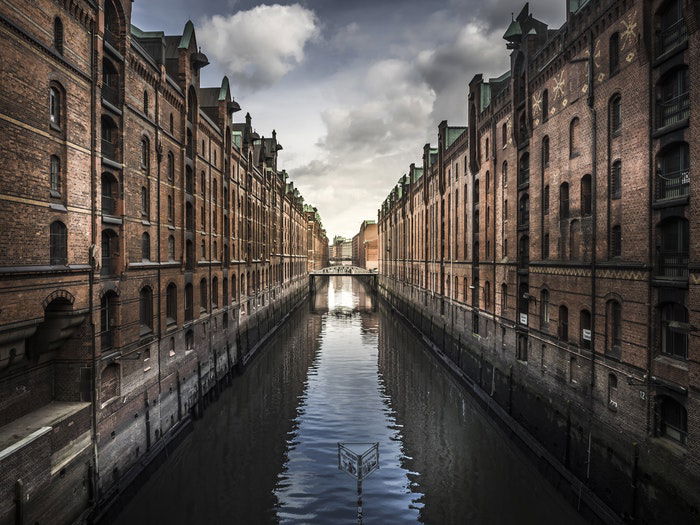
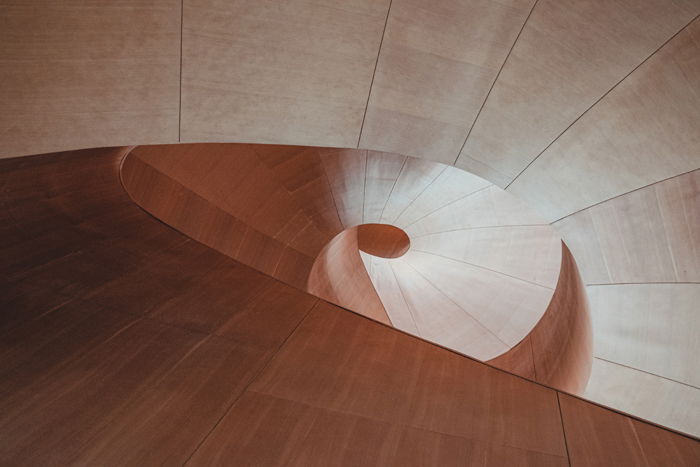
A photograph is symmetrical if it has two (almost) identical sides with a central point of axis. In other words, if you cut the photo in half, the left and right side mirror each other. Or the upper and bottom half are imitating each other. If we are very strict, symmetry means that the two sides should be 100% identical. But in photography, this is often not the case. For example, it is hard to find a perfect symmetrical balance in nature. Reflections in lakes, ponds or glass buildings can help you create symmetry in your photography. Symmetrical photos are always pleasing and balanced. They are also well-structured and convey harmony. Symmetry draws the viewers’ attention to all parts of the image. A symmetrical photo has equally weighed visual elements on either side. The only downside of symmetry in photography is that it can be boring. Have you ever looked at a photo and thought it looks too perfect, almost sterile? Symmetrical balance can often create flat results in images.
What Is Asymmetrical Balance in Photography?
When a photo is asymmetrical, it has unequal visual weight on either side. But those visual elements balance out each other. This means that an asymmetrical photo still follows the rules of composition. It is not only a chaotic miso-mash. That’s why it is hard to understand asymmetrical balance in photography. But how can you achieve well-composed asymmetry in your photos? It’s all about manipulating the visual weight of the elements.
Tips for Using Asymmetrical Balance in Photography
Now that we understand what asymmetrical balance means, let’s see how you can use it to your advantage. Once you learn how to incorporate it in your images, you will definitely have some unique results.
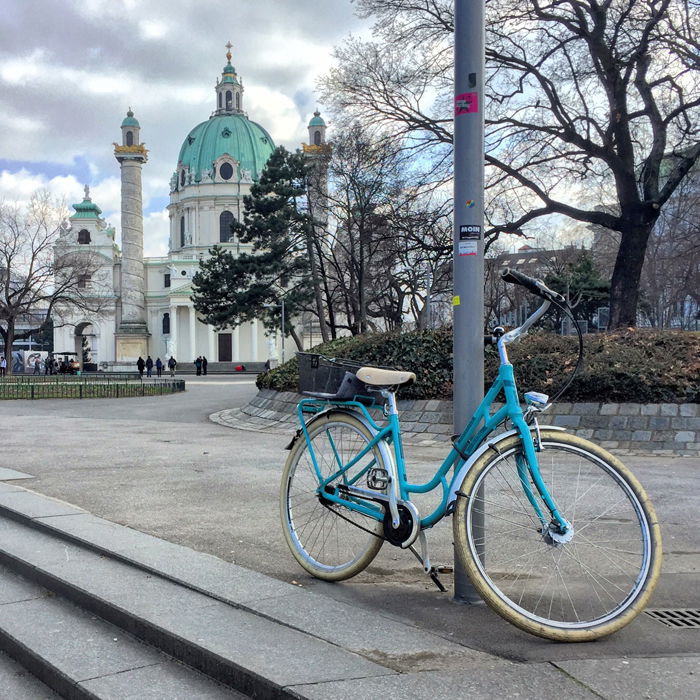
1. Use the Placement of Elements to Your Advantage
Placement can be an excellent way to create asymmetrical balance. It manipulates size, which affects the visual weight of objects. Check out this photo I took in Vienna. The church in the background is much bigger than the bike. But the bike is placed in the foreground, which makes it look bigger. Colors also help to balance the asymmetry in this photo. The bike and the church’s roof have similar colors. Even though they are not same, they are both variations of turquoise. Therefore, both of them draw the viewer’s attention. Last but not least, the shape of the two objects also enhance the asymmetrical balance. You can find this in the round shape of the bike’s wheels and the church’s structure.
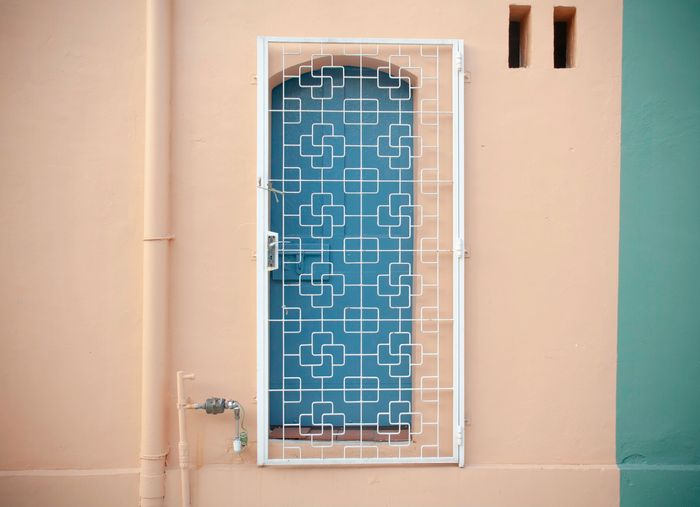
2. Manipulate the Framing
You can also turn a symmetrical object into asymmetrical by framing it in a different way. The photo of the green leaf below is a good example. You could frame it to show the symmetry of its veins along the axis. Instead, the midrib is closer to one side of the frame. This way, it creates an asymmetrical balance in the picture.
3. Apply Compositional Rules
One of the first things you learn when composing a photo is the rule of thirds. Did you realise before that this rule also goes against the features of symmetry? Instead of placing the main subject in the middle of the picture, you arrange it close to the intersecting lines. The rule of thirds is an excellent method to create asymmetry with in photography.
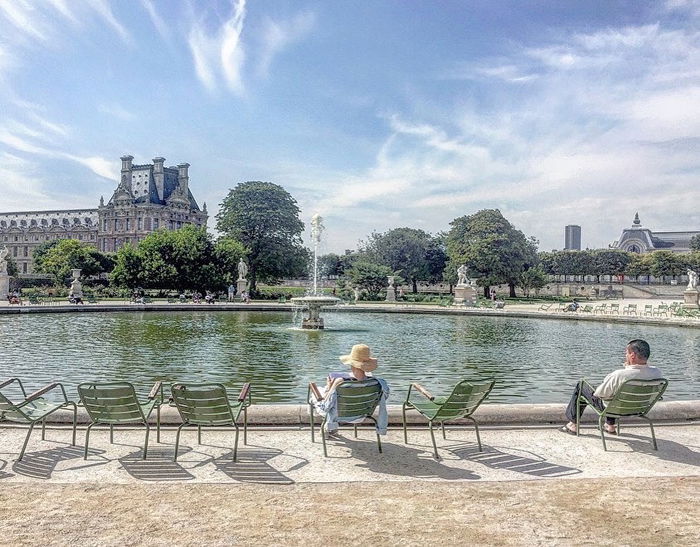
4. Group Objects Together to Create Asymmetrical Balance
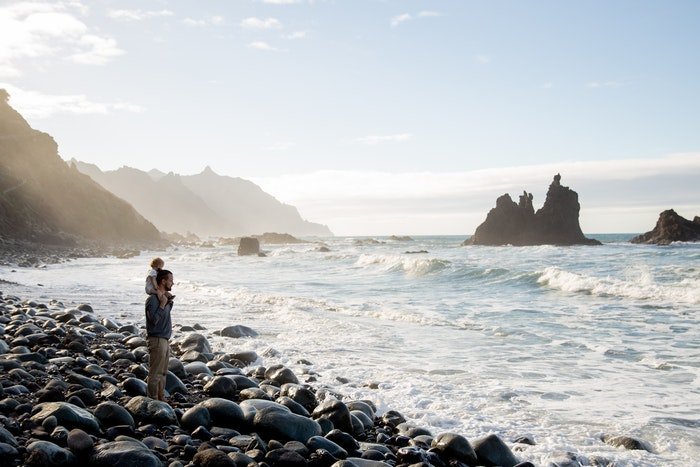
Look for objects that appear in groups of different sizes. The more elements are in a group, the greater their visual weight. Take a very general example of landscape photography. A big mountain is always drawing our attention in a photo. But if you place a few objects such as trees or rocks in the foreground, their visual weight will outnumber the mountain in the background. Or take a look at my photo I took in Paris. The tower of the Louvre is bigger than the chairs and the people in the foreground. But there are two people and six chairs. They gain visual weight because of their numbers. This way, they balance out the massive building in the background.
5. Use the Complexity of Your Subjects
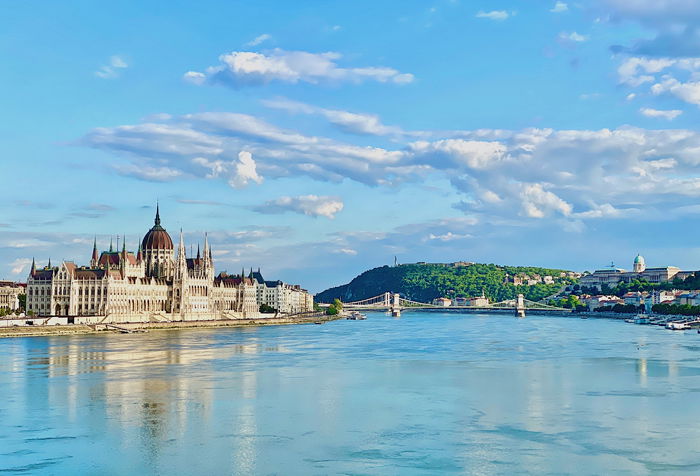
The complexity of your subjects can also create asymmetry in photography. Take a look at my photo of Budapest below. The Hungarian Parliament building is huge and is itself very complex. It catches the viewer’s attention easily. But take a look at the right side of the photo. You notice that there is, in fact, a lot going on. You can, for example, find a castle with numerous windows. There are buildings and trees below the castle. And you can spot a few docks on the river, too. Not to mention the Gellért Hill with the Statue of Liberty on top of it. The two bridges also lead our eyes from one side to the other. This photo is a good example of how a smaller but more complex side can gain visual weight in a photograph.
Conclusion
Asymmetrical balance in photography is not always easy to understand. And it is even harder to put the theory into practice. But when you learn how to do it, you will manage to create more exciting photographs. Use our tips to improve your composition skills! Wish you had on-the-go cheat sheets to help you with your composition? Why not check out our Quick Capture Cheat Sheets next!