For this reason, you need to consider many things before photographing wildlife. Plus, there are the creative and technical aspects of photography. These include light, composition, focus, and shutter speed. This post will take you through everything you need to know to improve your wildlife images. And these 14 tips apply whether you are photographing in the wilderness or in your own backyard!
Wildlife Photography Tips for Better Photos
Here are 14 wildlife photography tips to take fantastic photos. Come back to them often and watch your photography improve!
1. Do Research on When and Where to Take Wildlife Photos
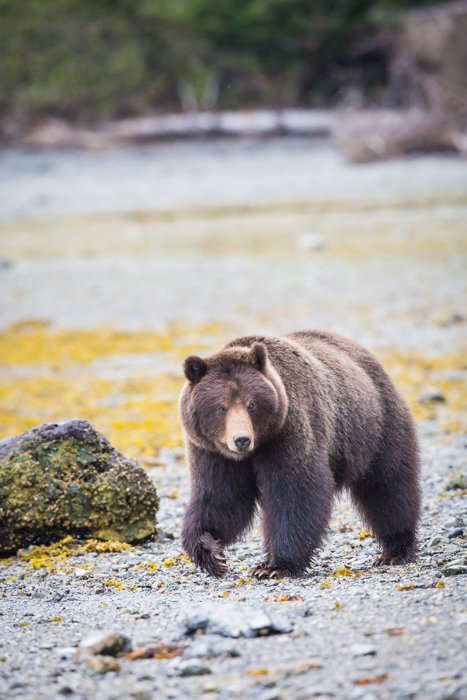
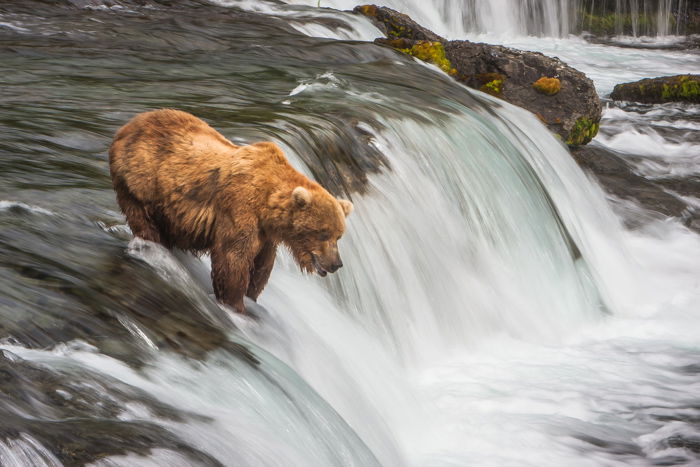
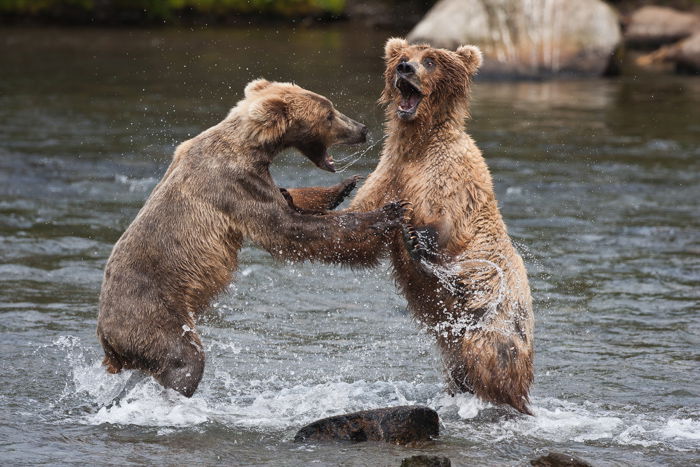
The most important skill of a good wildlife photographer has nothing to do with cameras or technique. If you want to get a good shot, it takes a lot of hard work and preparation. And using the internet as a research tool can greatly increase your chances of success. Say you want to photograph your local migrant birds. You should know what time of year those birds are present and their habitat. You might even want to know what they sound like so you can better find them in the field. Animals have different behavioral patterns depending on the season. And knowing their approximate location in a given month will help you to find them sooner (and photograph animals safely). Find out where animals live, what time of year they are present, what they eat, and how they interact with their environment. Not only will this knowledge help you find wildlife, but it will also help you make better images. So get to know the animals you want to photograph. For example, research informed me about early-season coastal brown bears in southeast Alaska. I had to be there in late April to photograph one (pictured below).
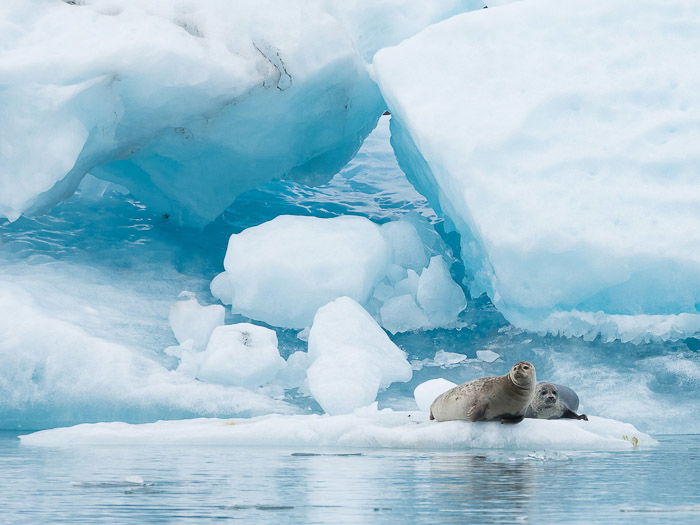
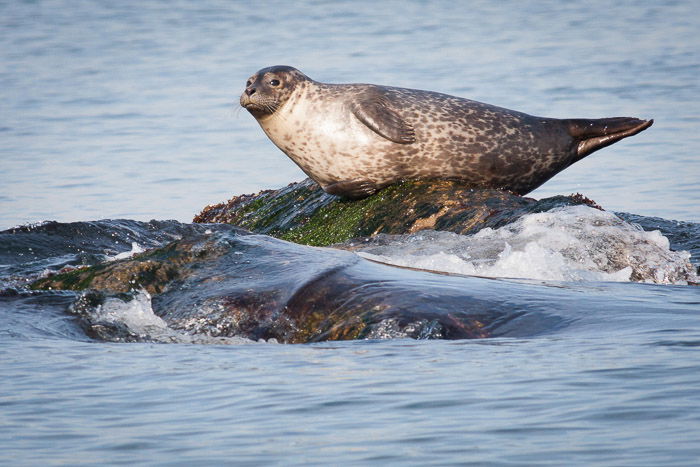
And as part of my preparation to photograph harbor seals, I researched the tidal charts off the coast of Long Island. At low tide, the water recedes to reveal large offshore rocks. These boulders are ideal for the harbor seals to rest and warm up on (pictured below). Wildlife is typically more active early and late in the day. So for a more natural wildlife experience, try heading out early in the morning when the animals are more active. With less of a crowd to frighten them, your photo opportunities become more abundant. Combine this knowledge with up-to-the-minute tweets of local wildlife sightings. And it suddenly becomes much easier to be in the right place at the right time.
Research helps you move beyond animal portraiture. It helps you discover compelling, story-telling images of wildlife and their environment. If you can’t find material on your particular subject, don’t fret. Sometimes learning about your subject is an observational process. That means you have to make your own field notes and do your own research while out shooting. Either way, if you consciously try to learn about your subject, you’ll have better images in no time!
2. Respect Wildlife, the Environment, and Others
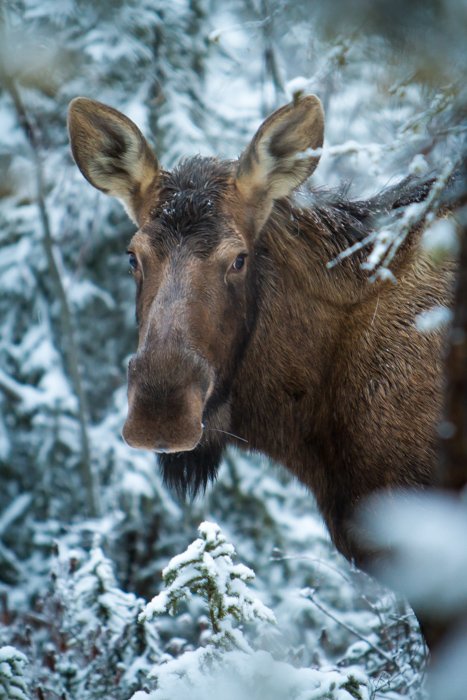
Wildlife photography has become more accessible. And overall, I say it is a good thing. It increases awareness of wildlife and generates interest in conservation. But it also comes at a cost. So much enthusiasm for wildlife photography can impact the animals themselves. Your absolute top priority as a wildlife photographer is to not harm the creatures and the environment you photograph. So practice ethical photography to ensure the welfare of your subject. Don’t stress wild animals. They should always have a route of escape. And if you’ve been stalking one, don’t corner them. So please pay attention to their behavior. And if an animal begins to look agitated, back off. Whenever an animal has run away, it means you got too close, and that animal had to use precious energy to escape. Every time that happens, it causes them extra stress. The reason why we photograph wildlife is to capture the beauty of the natural world. If we harm our subjects, there won’t be much of a natural world left. The welfare of your subject matters most! Also, follow the wildlife photography rules of the area you’re taking photos. For example, stay on trails and respect other users. I’ve often seen disrespectful photographers rudely step in front of others to make a shot. Or I’ve seen oblivious people tromp off a trail into a closed area. Please don’t be that person. And one autumn, I watched a photographer go dangerously close to a large bull moose in Alaska’s Denali National Park. He put himself between a couple of buses loaded with tourists eager to see the moose. Not only was he acting disrespectful to the moose, but also toward all his fellow visitors. So be mindful not only of your impact on the wildlife but also of the experience of other users. Eventually, if we don’t police ourselves, someone will start policing and restricting us. No matter how big your long lens is, it doesn’t grant you an exception to the rules.
3. Get Down Low for More Intimate Shots
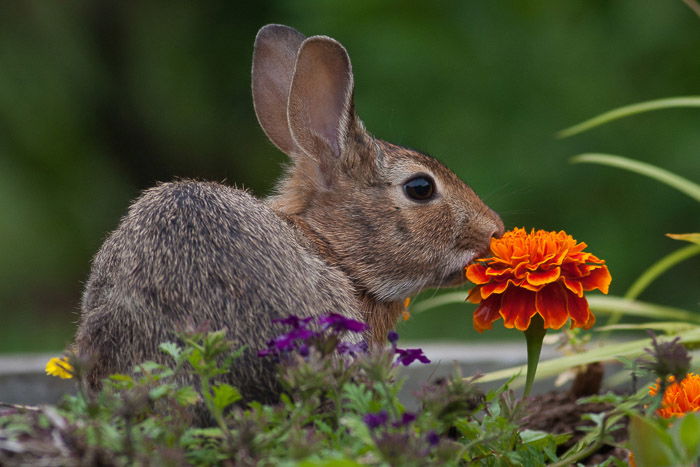
On the photo workshops and tours I lead, my students’ most frequent mistake is also one of the easiest to fix. (Assuming, of course, they don’t mind getting their knees a little dirty.) It’s to get down low! Wildlife images are almost always best when made from the eye level (or lower) of the animal you photograph. This might mean going as low as laying flat on your stomach! Images made from above lack a connection to the animal. I always encourage photographers to get down on their knees or, better yet, lie down. They’re all surprised by how much a lower perspective can improve their photography. Plus, walking up to an animal in the wild usually causes it to flee in fear. By crawling, you become far less threatening. Working from this bug’s-eye perspective, the photo also gives a more revealing portrayal of their habitat. To add even more impact, use a wide aperture like f/2.8. This will turn background and foreground elements like grass and flowers into soft washes of color.
4. Use a Long Telephoto Lens to Crop and Isolate
There is little question that a long lens is a vital part of any wildlife photographer’s equipment. A telephoto lens plays a couple of important roles. The first is magnification. A long lens, like 500mm, will make the animal appear much closer and take up a larger part of the frame. A long lens also allows you to cut out distracting elements from your frame. You can take a narrow slice of the scene to isolate the best parts and cut out the rest. A telephoto also compresses your depth of field (DOF). The DOF is the amount of the image in focus from front to back in the frame. Long lenses are particularly good at blurring foregrounds and backgrounds. This makes your subject stand out from their surroundings. The magnification of long lenses allows you to isolate the best part of your scene from side to side and top to bottom. And a shallow DOF allows you to isolate the best part from front to back.
5. Use Shorter Lenses for More Shot Variety
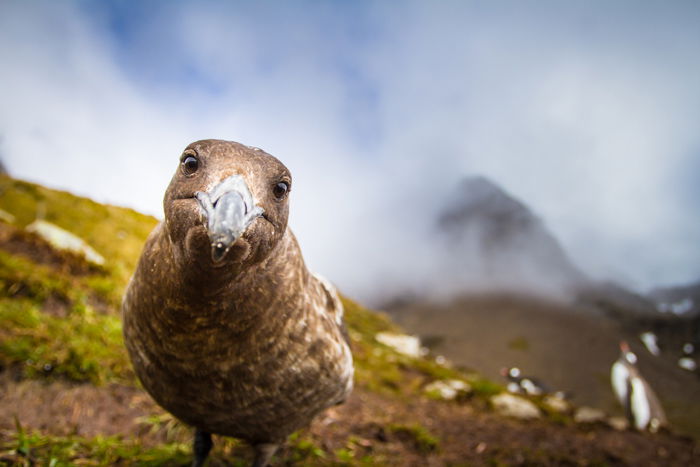
Long lenses are an indispensable part of a wildlife photographer’s equipment, but not every wildlife picture has to be made with a long lens. Wide-angle lenses can make great photos under the right circumstances. I was photographing on South Georgia Island a few years back, creating images of a few nesting gentoo penguins. I was lying on my stomach with a long lens, going for that low perspective I mentioned earlier. Then, out of the sky above me, a skua descended and alighted just a foot in front of me. The scavenger bird was curious about me (perhaps hoping I was carrion). And it kept inching forward, reaching out with its beak toward the lens of my camera. I slowly grabbed for my second camera body behind me that was equipped with a wide-angle zoom I’d been using for some landscapes. Slowly, I maneuvered the camera to my eye and snapped two photos of the skua. My motion and the camera’s noise made the bird realize that I wasn’t dead or dying after all, and it took to the air. But I managed to get two pictures first! The wide shot I created is much better than anything I could have created with a long lens under those circumstances. It showed some interesting behavior and the bird’s habitat, complete with nesting penguins in the background. Those aspects are all important and tell the viewer about the wildlife and how they live. Your images can get monotonous with just one kind of lens. So embrace a variety of focal lengths like mid-length telephotos and even wide-angle lenses. They will help improve your wildlife photography.
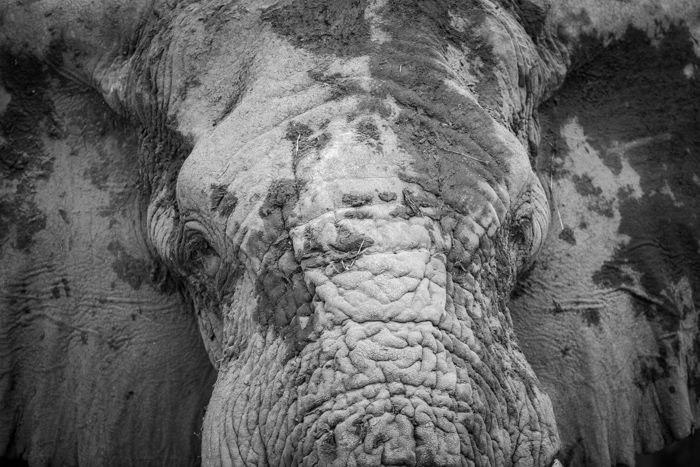
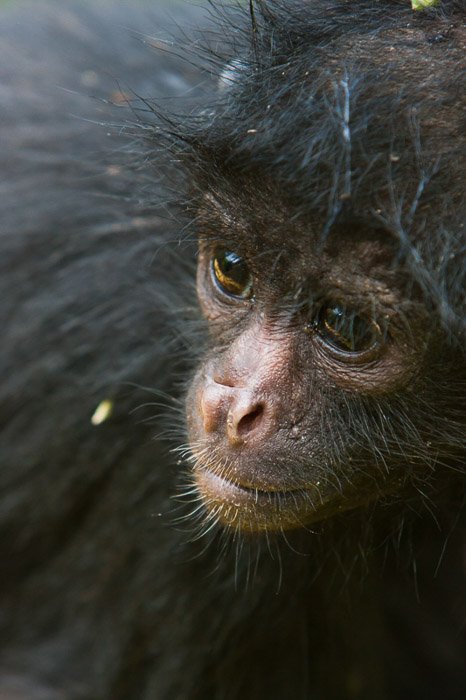
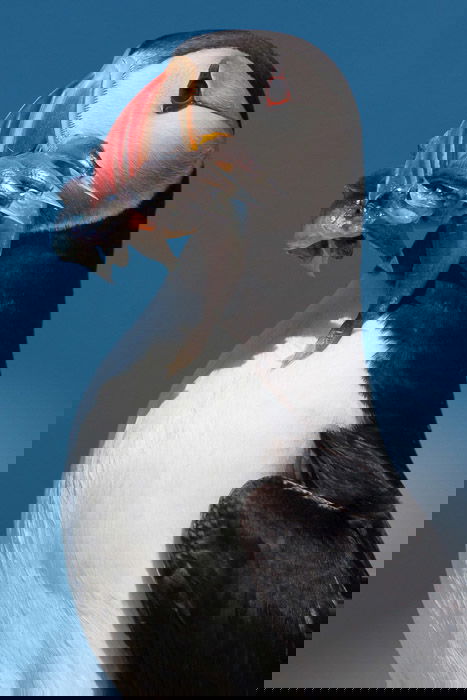
6. Get Up Close to Show Compelling Details
In wildlife photography, it’s often tempting to keep your distance. After all, animals are skittish. But sometimes, getting close and having those wild animals fill the frame is safe. Compelling shots transport the viewer into the world of the wild animal with intimate detail. And just like my skua image above, getting close to animals is a great way to help your audience connect to them. You can get close using a long lens or by getting close yourself. As I noted above, long lenses make an animal appear closer. And when it comes to large, dangerous, or delicate wildlife, this should be the only way you approach them. But getting close to animals (without disturbing them) offers an intimate connection for the viewer. Details will emerge like the textures in fur or feathers, eyes appear to glitter, and your viewers will begin to relate to the animal in the image. How to get close is another issue entirely, but the best way is the simplest… be patient. Simply place yourself in a likely area and waiting is a tried and true method. I’ve spent hours sitting quietly next to ponds waiting for waterfowl to paddle past. And I’ve sat on mountain ridges as a herd of caribou moved across the valley below. Though simple, this isn’t the same as easy. It’s hard to be patient. Other methods for getting close to wildlife warrant their own articles. That said, blinds are a useful tool. And even vehicles in areas where animals are accustomed to them can be a great way to get close. On a recent safari in Botswana, I was shocked at how close vehicles could approach wildlife without disturbing them. Of course, if I’d set foot outside the Land Cruiser, the animals would have either been spooked or eaten me! But one of my favorite methods for getting close is called the meander. It’s very simple—just two steps: And that’s it! If you’re patient enough, wildlife will soon view you as a boring landscape feature. I’ve used it hundreds of times, and it rarely disappoints.
7. Use the Right Camera Settings for Sharp Images
People often ask, “What is the correct shutter speed?” The surprising truth is that there is no single right or wrong answer. Ultimately, the “correct” setting depends on how fast your subject moves and what you try to achieve. You can choose to either freeze a subject or reveal its motion. Automatic options like a sports mode are unpredictable at best, typically serving up an array of blurry images. Instead of leaving this critical decision to the camera, set it yourself. To freeze most wildlife, you must be around 1/500 or 1/1000 s. If the animal is largely stationary, 1/250 s will be enough. It’s best to have a fast shutter speed to make a sharp image of wildlife with a long lens. A general rule of thumb is to set your shutter speed at least as fast as the length of your lens. If you shoot with a 500mm lens, you need at least a shutter speed of 1/500 s to create a sharp image. But if you are going for sharpness, the faster your shutter speed, the better. Even applying the rule of thumb above, using some lens support will help you achieve the sharpness you want. So when possible, use a tripod. When you can’t, brace off something instead. A tree, a car, or even a rock might work. Or you can lie down on the ground (getting that low angle) and use your backpack to support the lens. Most lenses are sharpest at a stop or two down from wide open. That means if your fastest aperture is f/4, you’ll get a sharper image around f/8 rather than wide open. Once you have selected the proper shutter speed and aperture, your exposure may still be too dark. If so, the solution is to raise your ISO. It’s a very effective method of perfecting exposure. Don’t worry about using extremely high ISOs. Cameras on the market today can be used at extraordinarily high ISOs. And they create just a fraction of the noise that previous models exhibited. Couple this with noise reduction in most image editing programs, and it’s a non-issue. Using the center autofocus options along with the AI Servo mode (Al Servo AF or Servo AF) will provide the best results for moving subjects. The outer points are difficult to adjust quickly and are not as sensitive as the middle point. Keep your active focus area on the animal with your shutter button held halfway down. This enables the AI Servo mode to track the subject and automatically adjust the focus. It works for subjects passing left to right and those heading directly toward you. Rather than using a one-shot mode, select the continuous high-speed burst mode to capture more frames per second.
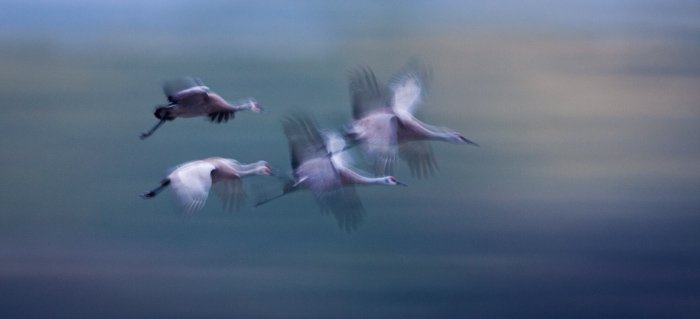
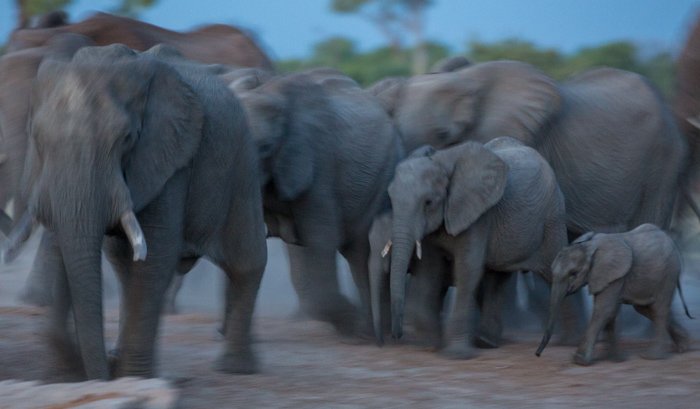
8. Include Blur to Show Dynamic Motion
Animals seem to be in constant motion. Birds fly by, caribou run, and elephants swirl around water holes. So images showing some of that movement as motion blur can be compelling. Creating a good motion blur requires some experimentation. Start by slowing your shutter speed. For a long lens, a shutter speed of around 1/60 s is often more than enough to show enough motion blur in fast-moving animals. Start there, then adjust up or down until you get the amount of blur you want. There are two methods to create these kinds of shots:
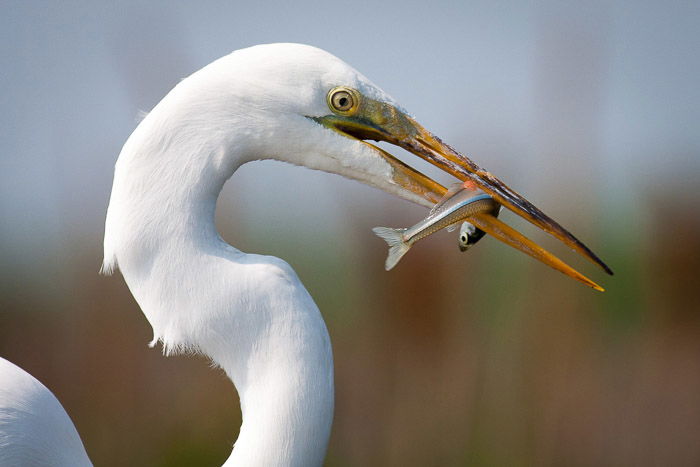
9. Focus on the Eyes
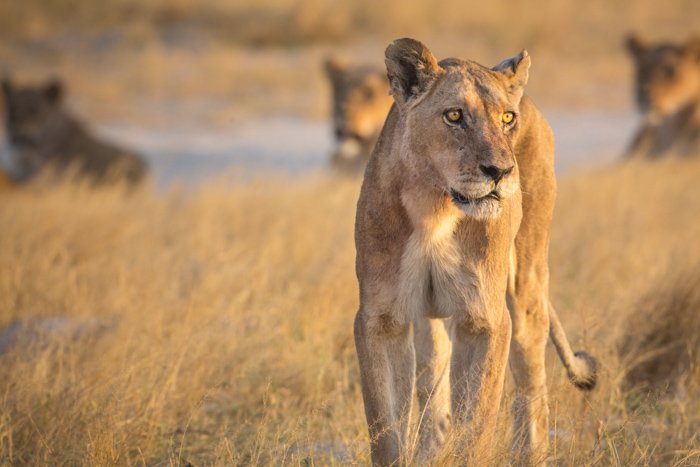
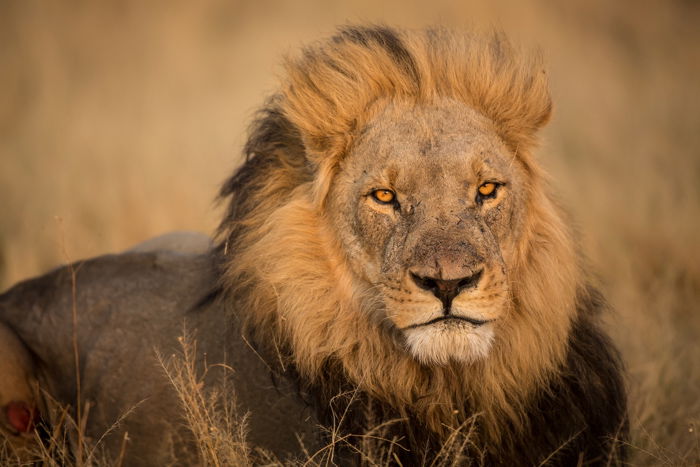
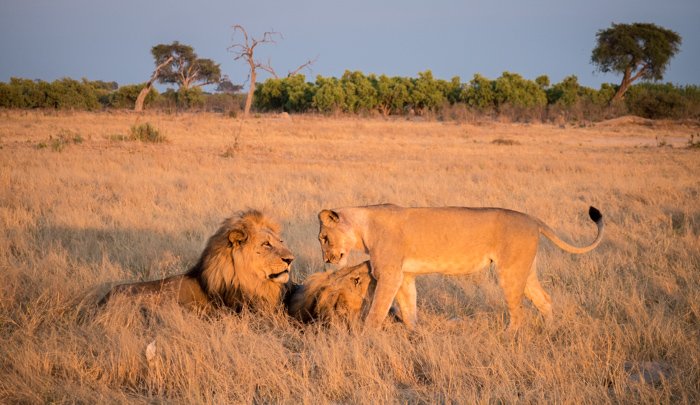
Most wildlife images look best when the animal’s eye is in focus. When you look at an image, whether it’s a portrait of a human or a picture of a wild lion, the entry point is the eyes. If those are out of focus, even just a bit, it throws off our perception of the image. So because eyes are the first thing we look at, their sharpness is doubly important. If I hadn’t caught the eyes of this lion in focus, this image would not have been successful. You can even try and capture catchlights in their eyes for interesting detail. Sometimes, you might be able to focus precisely on the eyes. This might happen if the animal is moving. But that’s okay. Just focus on the part of the animal near the eyes. You might focus on the face of the animal or the head. If you can get these in focus, the eye will generally be in focus.
10. Find the Right Background
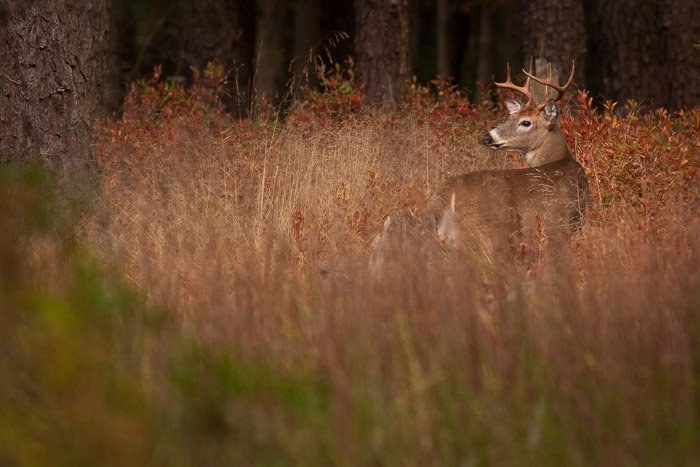
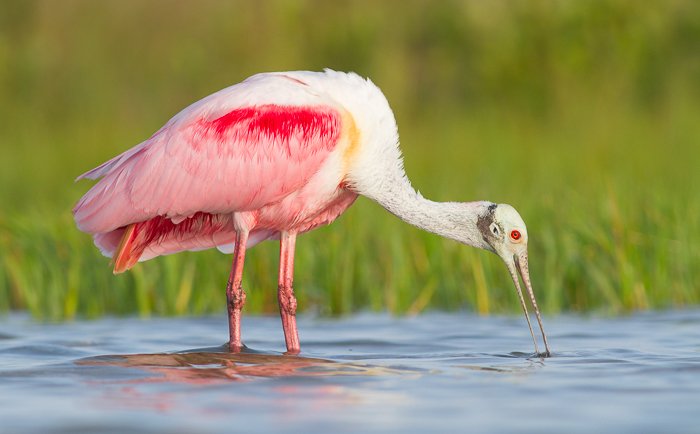
A good background can make all the difference. The main subject can be lost if the area behind your focal point is bright and distracting. So the best background often doesn’t detract from the subject. A good background is often a background that doesn’t detract from the subject. That means no lines running through your subject’s head. No trees seemingly sprouting from your subject’s body. No mess of clashing colors. An ideal background is simple. It can be a nice green palette of nearby plants or a nice, neutral white sky. A darker backdrop allows your subject to pop out of the frame. This is not overly technical but rather one of those techniques that help photographers develop their eye for a shot. But the actual background doesn’t have to be black. Heavy shade is the perfect way to get started. The trick is to find a subject in bright sun while the area behind it lies in shadow. Everything else becomes darker when using the main subject to expose the photo. Plus, a well-composed shot can show the environmental habitat and the animal itself. These kinds of images are more descriptive. They can tell a more compelling story than a simple portrait. Backgrounds are often neglected in wildlife photography. So pay attention to avoid this common mistake. You’ll come away with images that are even more impressive!
11. Go Beyond a Portrait Shot and Tell a Bigger Story
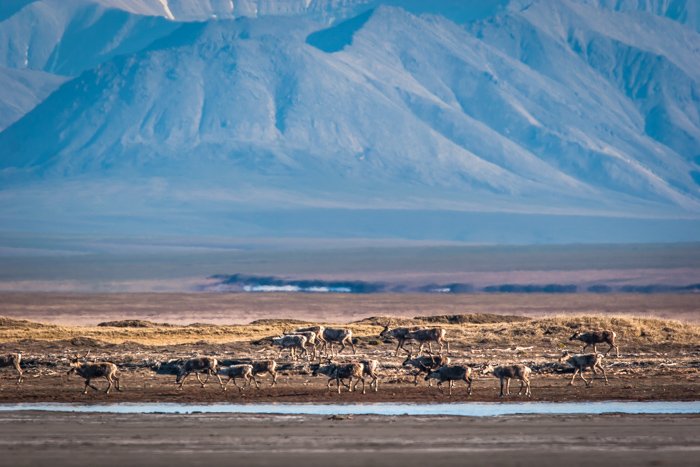
In just about every kind of photography, the best images are those that tell a story. In wildlife photography, those stories can be dramatic, like predation in action. But they can also be simple. An image of an animal within its habitat is one way. Or a simple interaction between two individuals is another. One iconic story is of caribou migrating across the coastal plain of the Arctic National Wildlife Refuge in Alaska (pictured below).
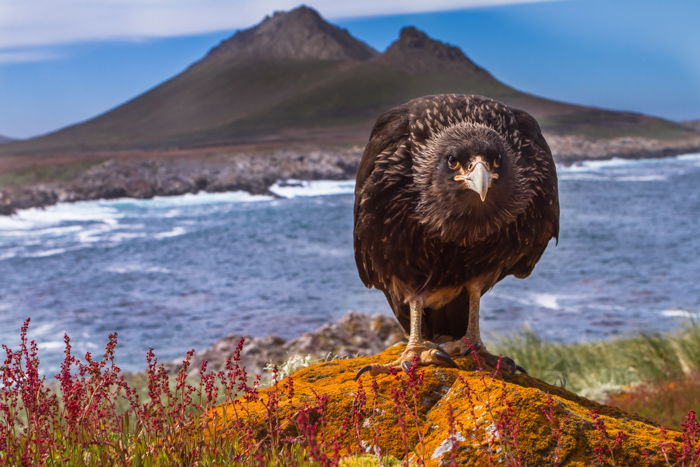
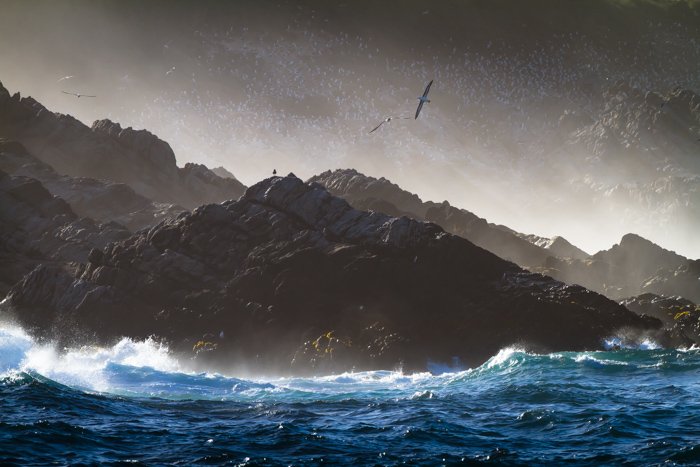
Think about the species you are photographing. How or where does it live? What does it do to survive? Then consider how your image can tell that story. Below is a photo of a black-browed albatross in front of early sunlight, sea haze, and a storm-tossed ocean. It proves that you don’t need to be close to create a quality wildlife image.
Wildlife photographers put a lot of effort into getting close. We buy long lenses or sit for hours in trees waiting for the right opportunity. But a close image is not always a great image. Nor is a distant animal a poor shot. Close or far, what matters is the story, the relationship, and how your viewer relates to the subject. Show how animals relate to one another!
12. Practice Near Home to Improve Your Skills
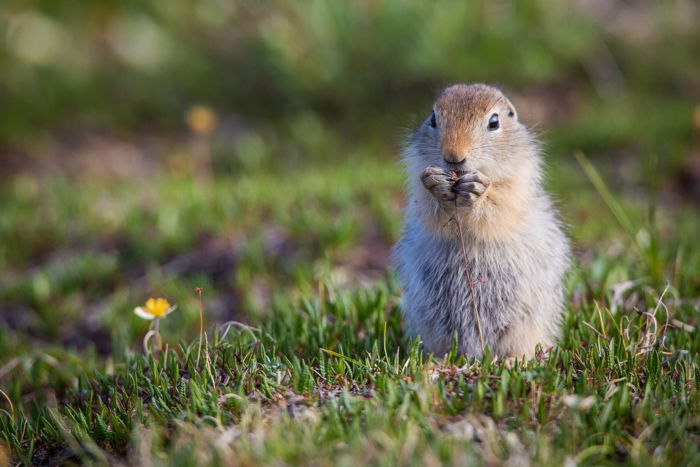
Extensive travel is not a prerequisite for creating great wildlife photos. You will often find wonderful and willing subjects outside your front door or just a short car ride away. Maybe it’s your backyard garden, a flower bed, or a bird feeder. Not all great wildlife photography is of predators or even large animals. Some of the most compelling images are those of small creatures— birds, insects, or even ground squirrels (pictured below). Creating images of common animals in your backyard or local parks is a great way to learn the necessary skills for animal photography. Practicing with common animals prepares you for more exciting moments in the wild. Identifying this home base is an important piece of wildlife photography. It’s a no-pressure zone where you can take your time, explore creative techniques, and test new equipment. By frequenting the same place, you start to observe the subtle changes in nature. Plus, you see the weekly improvements in your overall photography skills!
13. Be Safe When Photographing Wildlife
The internet is full of videos of “photographers” doing stupid things with wild animals:
Tourists holding cell phones up to bison in Yellowstone National Park charging too close Fools wielding selfie sticks wandering into the Brooks River with fishing bears People on a safari patting lions from through their vehicle’s windows
While animal attacks are exceedingly rare, it is important to remember that they are wild. Even in national parks where the wildlife is accustomed to having humans around, they are not pets. Keep a respectful distance. And learn a bit about animal behavior. That way, you’ll know when your subject is becoming agitated or stressed. By recognizing a dangerous situation, you can proactively remove yourself from the environment.
14. Be Patient With Wildlife Photography
I can think of no advice more important in wildlife photography than patience. You can’t rush the process. Plan your shoot and approach the image you want to create as a problem to be solved. Given the number of photographers worldwide, your images must be special if you want to be a great wildlife photographer. You have to go beyond taking simple snapshots. So how do you do this? The best way to create powerful wildlife images is to wait for unique moments. These are moments when your intended subject is doing something interesting or unusual. For birds, this often involves preening, bathing, or wing flaps. If you can catch wildlife in these unique situations, you’re guaranteed a shot that will stand the test of time. So don’t just snap away with your camera. Maybe take a few shots to record the beauty of your subject, then start thinking about more impressive images. Think about camera placement, how to get where you need to be, the lighting, and the animal’s activity. All this takes time. So above all, wildlife photography takes persistence. Stay determined, work hard and remain present and patient. The best photos come to those who wait!
Camera and Gear for Wildlife Photography
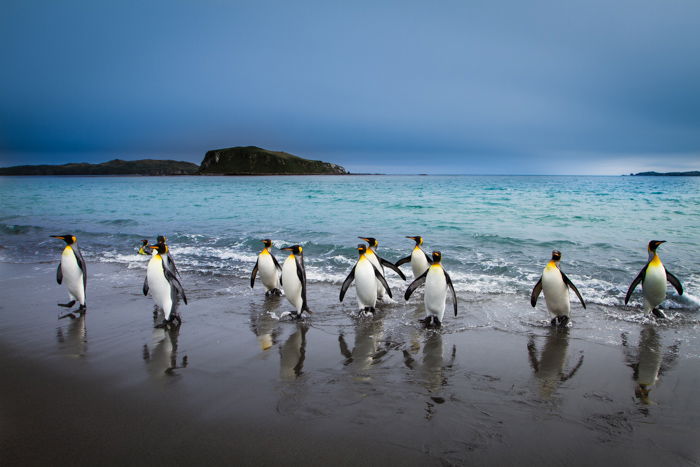
When I think about wildlife photography techniques, a few things stand out. Surprisingly, the first that comes to mind has nothing to do with equipment. But your gear does play an important role. Your kit for wildlife does not need to be huge. But a few things will prove useful: But don’t let your gear hold you back. Be creative and shoot with what you have. As my penguin photo (below) shows, you don’t always need a big telephoto lens!
Conclusion
Put everything together, from camera settings, perspective, and story-telling to equipment. Then you’ll start creating fantastic wildlife photos. Above all, make your wildlife photography thoughtful. Think about your creative choices and use them to tell the story of the animal. You’ll have much greater success and create better images if you do that. Wildlife photography can be a challenging but rewarding form of photography. Getting good at it takes time, practice, and patience, but the results are often worth it!